Header image

What Are FAST Channels and Why You Should Know About It?

28/06/2023

1.78k

Everyone seems to have a streaming service to access entertainment, news, and sports content today. However, there are still free alternatives available, including FAST Channels. So what are FAST Channels? You may not be familiar with the term FAST Channels, but you are likely familiar with FAST Channels such as Pluto TV, Peacock, The Roku Channel, IMDb TV, and Samsung TV+.

With over a thousand FAST Channels on the market, advertisers must understand how to work with these new channels and the opportunities for their advertising dollars in 2025. Fortunately, this article will provide a comprehensive guide on FAST Channel meaning and help you make an informed decision.

What are FAST Channels?

FAST (Free Ad-supported Streaming Television) Channel is an exciting service that offers free streaming of TV programs without any subscription fees. It’s like regular TV but delivered over the internet on devices like CTV. You can enjoy a mix of TV shows, movies, and digital content on these channels. Log in at the scheduled time to watch your favorite programs or movies, and although there may be occasional commercials, it’s just like watching traditional TV. Get ready for a convenient and entertaining streaming experience with FAST Channel!

⇒ Maybe you’ll be interested in:

defining-fast-channels

Source: Serverside.ai

How FAST Channels Work?

Simply put, FAST Channels offer a similar experience to traditional TV watching, where you tune in to specific shows on specific channels at set times. However, FAST Channel takes it further by allowing streaming through internet-connected devices. These channels stream content from networks and providers supported by ads, making them completely free for viewers.

FAST Channels combine the convenience of traditional broadcast with the streaming landscape, eliminating the need for actively selecting programs on a streaming platform. They work on connected TV devices like game consoles, Roku TV, Apple TV, and Amazon Fire. They can be used alongside popular subscription streaming services like Netflix, Hulu, and Amazon Prime. It’s an exciting way to enjoy a wide range of content without additional costs.

>>> Maybe you are interested:

The Benefits of FAST Channels

the-benefits-of-fast-channels

Source: Tom’s Guide

Although subscription video-on-demand (VOD) services like Netflix, Hulu, and Disney+ are becoming more popular, conventional linear TV is still widely watched. Up to 50+ million monthly active consumers of several FAST channel services exist. For media outlets, this is a golden opportunity.

Let’s discover some of the key benefits:

Acquire New Audiences

Distribution via FAST Channels can help you reach new audiences. Numerous services deliver viewers to your channel on your behalf. The free access model also attracts viewers who may not be willing to pay for subscription-based services, thus increasing the potential viewership and engagement.

Discover Niche-Specific Viewers

In addition to mainstream channels, FAST Channel services enable the distribution of niche content.

Your channel is more discoverable due to these platforms’ channel-surfing nature. Users will not always remain on a single channel for an extended period of time and will frequently peruse until they find something intriguing. Thanks to FAST channel switching, users can transition from one stream to another with minimal latency.

Establish a New Revenue Source

Profitability is another reason why content distributors should consider FAST channels.

Just like traditional TV, FAST channels can earn revenue through ad impressions. The channel owner gets paid based on how many people see the ads. The average adult watches almost five and a half hours of video content daily, so the number of views can increase.

Develop Targeted Advertising

Fast channels offer great opportunities for targeted advertising. Advertisers can utilize user data and preferences to reach specific audiences with relevant ads. This not only makes the ads more effective but also boosts the return on investment for advertisers. As a result, more advertisers are encouraged to collaborate with the distributor, leading to a positive and fruitful partnership.

Enhance Flexibility and Agility

FAST channels offer distributors the advantage of flexible and agile content delivery. They can frequently curate and update their content libraries, aligning with real-time audience preferences and trends. This adaptability empowers distributors to quickly respond to changing viewer preferences and elevate the overall viewing experience.

The Different Types of FAST Channels

the-different-types-of-fast-channels

Source: Digital TV Europe

Conventional vs. Premium FAST Services

Conventional FAST services provide linear channels with ad gaps, whereas premium FAST services offer additional alternatives, such as pay-per-view and subscriptions, that enable users to avoid advertisements.

Platform Exclusive vs. Platform Agnostic FAST Services

With Platform Agnostic FAST Services, users can access their favorite content on any device they prefer. Exciting options like Pluto TV, Xumo, Peacock, and Roku offer this versatility.

In contrast, platform-exclusive FAST services are limited to specific operating systems. This means users need to buy TVs from particular manufacturers to access those specific FAST services. For example, LG channels are exclusive to LG webOS televisions. Additional examples include:

  • Samsung TV+ (used for Samsung smart TVs)
  • Vizio WatchFree (used for Vizio smart TVs)
  • TiVo+ (used for TiVO devices)

Niche/Syndicated vs Branded FAST Channels

Generally, syndicated channels are curated and managed by an established FAST service. There are various thematic channels on Xumo, such as Action, Black Cinema, and Science Fiction.

Meanwhile, Branded FAST channels are usually published/operated by content creators or owners.

get-start-with-fast-channels

Source: CLUB PCBOX

SupremeTech Helps You Get Started with FAST Channels

So what are FAST channels? In a word, Fast channels have revolutionized the way viewers access and consume content.

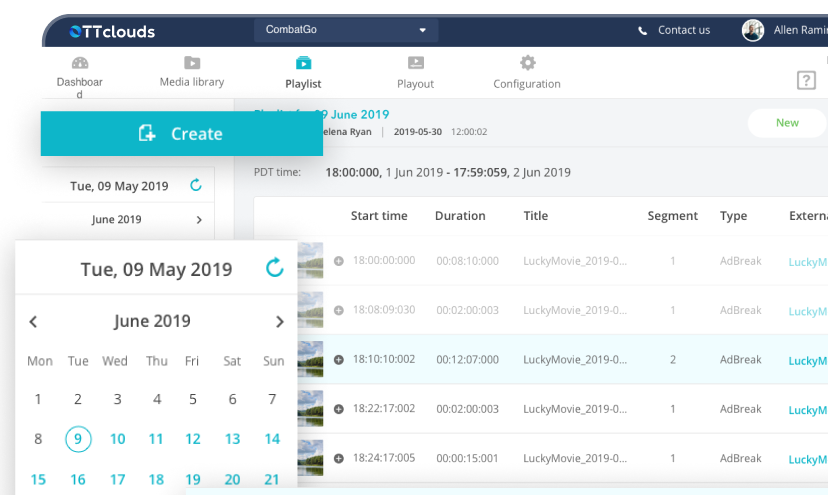
To explore the world of FAST Channels and embark on your streaming journey, SupremeTech offers comprehensive solutions. Our end-to-end OTT streaming solution – OTTclouds – can help you ensure seamless content delivery and an exceptional viewer experience with top-notch content accessible from all devices. OTTclouds aims to create a one-stop service for content enterprises to catch up with the technology trend, distribute their videos, programs, and ads to their current internet users and continue growing their business.

Contact us now to take a step forward and discover the exciting streaming possibilities with SupremeTech’s OTT Streaming Solution.

Related Blog

Our success stories

+0

    How to Upgrade Aurora MySQL Databases: Lessons Learned from SupremeTech

    Upgrading a critical database like Aurora MySQL can feel daunting. We want better performance and a smooth system, but downtime and data risks can loom large. At SupremeTech, we’ve tackled this challenge head-on and shared our proven approach.  This insight comes from Mr. Phuoc Pham, our Infrastructure Manager, who presented at the morning session of "Harnessing AI on AWS: Transforming Software Builders for the Future" event by AWS and MegazoneCloud. The event focused on giving software companies tools, strategies, and real-world solutions to innovate, boost performance, and grow globally with AI. In his talk, Mr. Phuoc revealed our 6-step process that minimizes risks, protects data, and increases efficiency. Here’s how we did it, key lessons learned, and how you can ensure a smooth and risk-free database upgrade. Mr. Phuoc Pham, our Infrastructure Manager, presented the lesson learned from Aurora MySQL upgrades SupremeTech’s contribution to the AWS and Megazone event SupremeTech partners with AWS and MegazoneCloud to share our expertise in tackling technical challenges. In the morning session, Mr. Phuoc Pham delivered a presentation on lessons learned from Aurora MySQL upgrades, offering practical tips for software companies to optimize their infrastructure. In the afternoon, our chairman, Mr. Truong Dinh Hoang, joined a panel discussion on future trends for ISVs, highlighting strategies for growth and innovation. These contributions underscored SupremeTech’s commitment to helping businesses enhance performance and scale smarter. In the afternoon panel discussion, Mr. Truong Dinh Hoang shared about the market expansion and future trends for ISVs. The Challenges of Upgrading Aurora MySQL Mr. Phuoc kicked off by sharing real-world challenges we faced with a client’s Aurora MySQL upgrades: Minimal downtime: We had to finish in under 2 hours, including rollback time if needed.System stability: Our database powers multiple services, so it had to stay reliable post-upgrade.Fast rollback: We needed a quick way to revert without losing data if something went wrong.User impact: Our process had to keep disruptions low and customer trust high. These hurdles might sound familiar if you’ve upgraded a system. The key to achieving this is a structured and well-tested upgrade process. Mr. Phuoc Pham presented the challenges of upgrades for our client’s system. The 6-Step Database Upgrade Process At SupremeTech, we follow a 6-step upgrade process to ensure a smooth transition. Step 1: Collect and Analyze Data Before the Upgrade Preparation is everything. Before making any changes, assessing your current database setup is essential. This helps identify potential risks and prepare for a smooth transition. Mr. Phuoc emphasized checking: Database Schema & Objects – Make sure there are no conflicts with the new version.Connected Applications – Identify all services using the database.Custom Database Settings – Compare parameter changes between versions.Performance Metrics – Monitor CPU, memory, query latency, and transaction speed. We gather this information using tools like database logs, security groups, and queries like SHOW FULL PROCESSLIST. This step prepares us for a smooth upgrade. Mr. Phuoc shared one of our 6-step upgrade processes. Step 2: Choose the Right Upgrade Method with C.I.D.D.E.R Framework Not all upgrade methods are the same. Depending on your system’s needs, you may choose one of the following: Snapshot Restore – Reliable but requires full backup and longer downtime.Clone Cluster – Fast rollback but requires additional storage.In-Place Upgrade – Minimal downtime but higher risk.Blue/Green Deployment – Safest rollback option but costly. At SupremeTech, we use the C.I.D.D.E.R framework to decide the best method based on: Complexity: How hard is the upgrade?Infrastructure Cost: What’s the budget hit?Downtime: How long will it take?Dependencies: What else relies on our database?Expertise: Do we have the skills?Rollback Strategy: How easy is it to undo? Choosing the right upgrade method can reduce risk and save time. For this case—a 10GB database, multiple services, and a team still building experience—we chose an in-place upgrade with a clone cluster backup for quick rollback by renaming the database cluster. It kept the endpoint intact and downtime under 2 hours. Step 3: Test with a Dry Run “There’s no place like production,” Mr. Phuoc quipped, stressing the need for practice.  A dry-run is a test upgrade performed in a staging environment to catch problems before they affect real users. We run dry runs on a cloned database and DEV/STG environments to: Detects issues before they impact production.Reduces unexpected downtime.Helps estimate the actual upgrade time. This extra step can save hours of troubleshooting later. Step 4: Fine-Tuning Based on Dry-Run Results After testing, we adjust the process: Adjust database settings.Fix errors from the dry run.Shorten execution time for less downtime.Refine rollback procedures.Update guides for our team. A few small tweaks before the upgrade can prevent major issues after it. Step 5: Deployment – The Actual Upgrade With everything tested and fine-tuned, it's time to execute the upgrade in production. How we ensure success: Perform the upgrade during low-traffic hours.Keep the rollback plan ready.Monitor logs in real time for any errors. Having a clear step-by-step deployment plan prevents last-minute surprises. Step 6: Monitor After the Upgrade Post-upgrade, we track key metrics like: Resources: CPU, memory, disk usage.Performance: Query response time, QPS, TPS.Errors: Any glitches or slow queries.Data Integrity: No data loss or corruption. Continuous monitoring after the upgrade helps us spot issues quickly, reducing troubleshooting time and minimizing the impact on our customers. We monitor key performance metrics for both the new and old databases to compare. We also watch the four golden signals—latency, traffic, errors, and saturation—to get a full picture of system health. At SupremeTech, we use AI-powered tools like Amazon Q to analyze database logs and detect anomalies faster than manual monitoring. Why post-upgrade monitoring matters: Quickly identifies hidden performance issues.Ensures the upgrade was 100% successful.Helps optimize for better database efficiency. Boosted performance and customer trust are critical criteria when we implement upgrades. Results & Lessons Learned Our Results By following this 6-step process, SupremeTech successfully upgraded Aurora MySQL with: Done in under 2 hours of downtime.Lowered infra costs with smarter planning.Boosted performance and customer trust. Key Takeaways Mr. Phuoc wrapped up with these gems: Prep is everything: Gathering and analyzing info before the upgrade is critical to spot risks early.Plan for data checks: We ensure data integrity with a solid verification plan.Pick the right approach: We choose deployment and rollback methods that fit our clients’ operations.Keep monitoring: Continuous tracking helps us stay ahead of issues.Automate with AI: Using AI and tools speeds us up and cuts errors. Wrapping Up Upgrading a database doesn’t have to be a risky, stressful process. You can confidently upgrade with the right preparation, testing, and monitoring. Thanks to Mr. Phuoc Pham’s presentation at the AWS and MegazoneCloud event, our 6-step process at SupremeTech proves you can keep risks low, protect data, and emerge stronger when doing Aurora MySQL upgrades. If your company is planning a database upgrade and needs expert guidance, contact our team at SupremeTech. We help businesses upgrade critical databases without disruption. Want to learn more about cloud database best practices? Stay tuned for more insights from our tech experts! Related articles about AWS: Mastering AWS Lambda: An Introduction to Serverless ComputingCreate Your First AWS Lambda Function (Node.js, Python, and Go)Triggers and Events: How AWS Lambda Connects with the WorldBest Practices for Building Reliable AWS Lambda Functions

    21/03/2025

    40

    Our success stories

    +0

      How to Upgrade Aurora MySQL Databases: Lessons Learned from SupremeTech

      21/03/2025

      40

      Our success stories

      +0

        SupremeTech Partners with AWS and MegazoneCloud to Drive AI-Powered Business Growth

        SupremeTech is pleased to announce our collaboration with AWS and MegazoneCloud for an upcoming event, Harnessing AI on AWS: Transforming Software Builders for the Future, scheduled for March 20, 2025, in Da Nang. This event is about giving software companies the tools, strategies, and real-world solutions they need to spark innovation, boost performance, and even take their businesses global with AI. The software world is changing fast, and Artificial Intelligence is leading the charge. Companies that tap into AI on AWS are finding new ways to grow, streamline their workflows, and stay ahead of the game. This event offers software firms in Da Nang and beyond the chance to see how AI can level up your business and prepare them for the future. SupremeTech’s Contribution to the Event In partnership with AWS and MegazoneCloud, SupremeTech will share valuable insights from our experience mastering complex technical challenges, such as Aurora MySQL upgrades. We will break it down into practical tips and solutions that software companies can use to fine-tune their infrastructure and grow smarter. The SupremeTech partners with AWS and MegazoneCloud event is structured into two key sessions: Morning Session: Accelerating Technical Performance Enhancing Product Value with AI/ML Services: Attendees will learn how AWS’s advanced tools, including Amazon SageMaker and Bedrock, can optimize infrastructure, improve performance, and reduce time to market.Real-World Solutions: Megazone will present hands-on demonstrations of AI services on AWS, offering insights into seamless integration and proven strategies derived from their own expertise. Afternoon Session: Strategic Growth Expansion Scaling with AWS Programs: Discover how AWS initiatives such as the ISV Accelerate and Workload Migration Program (WMP) can accelerate market expansion and support rapid business growth.Global Opportunities with MegazoneCloud: Explore how MegazoneCloud’s extensive partner network and the AWS ecosystem can help software companies bring their products to international markets. This event is more than a technical gathering; it represents a strategic opportunity for software businesses to advance their capabilities and adopt AI effectively on AWS. Why You Should Attend Actionable Strategies: Gain practical knowledge to integrate AI into your business operations.Expert Insights: Benefit from the expertise of SupremeTech, AWS, and MegazoneCloud leaders with proven success in the AI landscape.Networking: Connect with industry peers and potential partners within Da Nang’s growing tech community.Global Expansion: Access tools and programs to scale your business internationally. Event Details Date: March 20, 2025Location: Voco Ma Belle Danang - 168 Vo Nguyen Giap Street, Son Tra Da Nang, Vietnam Register Today to Stay Ahead in the AI Era Do not miss this opportunity to leverage AI on AWS and position your software business for success. Join the event that SupremeTech partners with AWS and MegazoneCloud on March 20, 2025, to grab the insights and tools you need to lead the charge in innovation and growth. Click Here to Register Now and take the first step toward a future of innovation and growth. Related articles about AWS: Mastering AWS Lambda: An Introduction to Serverless ComputingCreate Your First AWS Lambda Function (Node.js, Python, and Go)Triggers and Events: How AWS Lambda Connects with the WorldBest Practices for Building Reliable AWS Lambda Functions

        11/03/2025

        71

        Ngan Phan

        Our success stories

        +0

          SupremeTech Partners with AWS and MegazoneCloud to Drive AI-Powered Business Growth

          11/03/2025

          71

          Ngan Phan

          E-commerce (Shopify)

          +0

            How to Build a High-Performing E-commerce Store

            E-commerce is growing every year and is set to make heavy profits, with more and more people opting for it. However, with ever-growing competition in this domain, you need to stand out to stay afloat. You have to compete with giants like Amazon, eBay, and Alibaba, which can give you a tough time. In this blog, we will discuss building a high-performing e-commerce store in detail. So, let’s get started. See more: Exploring 7 Top Online Food Ordering Systems for Small BusinessesSmooth Sailing: How to Migrate Website to Shopify? Step-by-Step Procedure for Building an E-commerce Store E-commerce stores are becoming increasingly popular due to their range of products on a single platform, short delivery time, and easy payment options. Let’s go through a step-by-step procedure for building an attractive and high-performing e-commerce store. Step 1: Choose Your Platform Each e-commerce store is unique and has its own goals and target audience. Hence, you need to choose an ideal e-commerce platform for your needs. There are a number of options available including Shopify, WooCommerce, Squarespace, WordPress and more.  These eCommerce platforms have their own features, so you should discuss each one with your development team and pick the most suitable one for your needs. Step 2: Create an Account on the Chosen Platform Once you have chosen your eCommerce store platform, you need to purchase the subscription, in case it is not open source. These platforms offer a variety of plans, uptime guarantees, and security features.  If you have chosen an all-in-one e-commerce platform, all you need to do is go to the provider’s website and create an account. Then, you select a plan and pay for it if it is not free. Step 3: Choose a Template After you have decided on your eCommerce platform, you will have a variety of options regarding templates. Each has its own colors, fonts, and layouts, which gives an e-commerce store a consistent look and feel. Templates can be free or premium ones, for which you need to pay. Generally speaking, paid ones offer more features and designs. This saves time which will be spent on coming up with designs from scratch. Step 4: Build Your Webpages & Product Pages You must not use the template as it is; you should customize it according to your requirements. Some common customizations include adding your logo and contact details.  Other changes could be adding product images, configuring your site navigation, and building check-out and returns pages. Step 5: Write Product Descriptions As it is not a brick-and-mortar store where customers can view the products or feel them, you need to work on your product descriptions along with images. They need to be very accurate, easy to understand, and detailed. It should include basic details, along with information about who the product is meant for and where it can be used.  Product images should be high-definition and of the same size, and should show the product from all possible angles.  Step 6: Set Up Payment Gateway As most of your customers will opt for online payments and not Cash on Delivery, you need to have a secure payment gateway. So, integrate secure payment options on your e-Commerce store, which are hassle-free, fast and secure at the same time.  If you redirect your customers to other platforms like PayPal, ensure that data is fully encrypted.  If your payment options are not convenient, no matter how good your product catalog is, customers will not come back. Step 7: Integrate Shipping  The platform you have chosen for your e-Commerce store may allow integrated shipping along with selling. This creates a seamless customer experience and lets you focus on selling products.  You also need to decide on your shipping policy, such as free shipping, flat rates, variable fees, etc. Along with this, you need to decide on your returns and refund policy to make the situation clear for your customers. Step 8: Test & Launch Your e-Commerce Store After all the hard work, it is time to test your e-commerce store before launching it. You should do rigorous testing to ensure there are no bottlenecks and pain points. You can do the testing in-house or outsource the task.  Check all links, buttons, and navigation options and ensure they work. Payment processing should also be thoroughly checked. Your e-commerce store should be compatible with desktop, mobile devices, and all browsers. Once everything has been checked, you are ready for launch. Popular eCommerce Platforms To Consider Several options are available for e-commerce platforms. Let’s discuss some popular ones to help you choose. Shopify Shopify is an eCommerce platform suitable for Web, iOS, and Android. It is easy to set up and has all the necessary tools. The support and resources provided are best in class, which makes it popular and effective.  The only constraint of Shopify is that it can be expensive if you add many extra apps. Many eCommerce stores currently run on Shopify, which has been around for 18 years and is ideal for small businesses that want to go online. BigCommerce BigCommerce is an e-commerce platform suitable for Web, iOS, and Android devices. It is the SMB version of a very popular enterprise eCommerce platform. It has integrated features like shipping and taxes to encourage established businesses online. However, it is not recommended for small retailers setting up their businesses.   It also enables listing your products on e-commerce giants like eBay, Walmart, and Amazon.  As a result, customers do not necessarily have to buy from your store.   BigCommerce has 12 free themes, all of which have a great look. They also have a drag-and-drop site builder that can be used to customize the look.  WooCommerce   WooCommerce is an e-commerce platform for the Web, iOS, and Android. It provides all the flexibility of WordPress, is widely supported, and has many apps and integrations. Installing WooCommerce on your website is very easy, similar to installing any  other plugin on WordPress. If you use WordPress for your eCommerce store, you should ideally go for WooCommerce. Wrapping Up E-commerce is still nascent and will continue to grow over the decade. It provides a range of products and the convenience of buying them from your home from across the world. So, whether you are starting or have an established business, you should consider going online, as it will increase your reach. After considering everything, you should choose your e-commerce store platform. This will ensure that you have a high-performing e-commerce store. For building your e-Commerce store, get in touch with SupremeTech. 

            10/03/2025

            50

            E-commerce (Shopify)

            +0

              How to Build a High-Performing E-commerce Store

              10/03/2025

              50

              Knowledge

              +0

                Best Practices for Building Reliable AWS Lambda Functions

                Welcome back to the "Mastering AWS Lambda with Bao" series! The previous episode explored how AWS Lambda connects to the world through AWS Lambda triggers and events. Using S3 and DynamoDB Streams triggers, we demonstrated how Lambda automates workflows by processing events from multiple sources. This example provided a foundation for understanding Lambda’s event-driven architecture. However, building reliable Lambda functions requires more than understanding how triggers work. To create AWS lambda functions that can handle real-world production workloads, you need to focus on optimizing performance, implementing robust error handling, and enforcing strong security practices. These steps optimize your Lambda functions to be scalable, efficient, and secure. In this episode, SupremeTech will explore the best practices for building reliable AWS Lambda functions, covering two essential areas: Optimizing Performance: Reducing latency, managing resources, and improving runtime efficiency.Error Handling and Logging: Capturing meaningful errors, logging effectively with CloudWatch, and setting up retries. Adopting these best practices, you’ll be well-equipped to optimize Lambda functions that thrive in production environments. Let’s dive in! Optimizing Performance Optimize the Lambda function's performance to run efficiently with minimal latency and cost. Let's focus first on Cold Starts, a critical area of concern for most developers. Understanding Cold Starts What Are Cold Starts? A Cold Start occurs when AWS Lambda initializes a new execution environment to handle an incoming request. This happens under the following circumstances: When the Lambda function is invoked for the first time.After a period of inactivity (execution environments are garbage collected after a few minutes of no activity – meaning it will be shut down automatically).When scaling up to handle additional concurrent requests. Cold starts introduce latency because AWS needs to set up a new execution environment from scratch. Steps Involved in a Cold Start: Resource Allocation:AWS provisions a secure and isolated container for the Lambda function.Resources like memory and CPU are allocated based on the function's configuration.Execution Environment Initialization:AWS sets up the sandbox environment, including:The /tmp directory is for temporary storage.Networking configurations, such as Elastic Network Interfaces (ENI), for VPC-based Lambdas.Runtime Initialization:The specified runtime (e.g., Node.js, Python, Java) is initialized.For Node.js, this involves loading the JavaScript engine (V8) and runtime APIs.Dependency Initialization:AWS loads the deployment package (your Lambda code and dependencies).Any initialization code in your function (e.g., database connections, library imports) is executed.Handler Invocation:Once the environment is fully set up, AWS invokes your Lambda function's handler with the input event. Cold Start Latency Cold start latency varies depending on the runtime, deployment package size, and whether the function runs inside a VPC: Node.js and Python: ~200ms–500ms for non-VPC functions.Java or .NET: ~500ms–2s due to heavier runtime initialization.VPC-Based Functions: Add ~500ms–1s due to ENI initialization. Warm Starts In contrast to cold starts, Warm Starts reuse an already-initialized execution environment. AWS keeps environments "warm" for a short time after a function is invoked, allowing subsequent requests to bypass initialization steps. Key Differences: Cold Start: New container setup → High latency.Warm Start: Reused container → Minimal latency (~<100ms). Reducing Cold Starts Cold starts can significantly impact the performance of latency-sensitive applications. Below are some actionable strategies to reduce cold starts, each with good and bad practice examples for clarity. 1. Use Smaller Deployment Packages to optimize lambda function Good Practice: Minimize the size of your deployment package by including only the required dependencies and removing unnecessary files.Use bundlers like Webpack, ESBuild, or Parcel to optimize your package size.Example: const DynamoDB = require('aws-sdk/clients/dynamodb'); // Only loads DynamoDB, not the entire SDK Bad Practice: Bundling the entire AWS SDK or other large libraries without considering modular imports.Example: const AWS = require('aws-sdk'); // Loads the entire SDK, increasing package size Why It Matters: Smaller deployment packages load faster during the initialization phase, reducing cold start latency. 2. Move Heavy Initialization Outside the Handler Good Practice: Place resource-heavy operations, such as database or SDK client initialization, outside the handler function so they are executed only once per container lifecycle – a cold start.Example: const DynamoDB = new AWS.DynamoDB.DocumentClient(); exports.handler = async (event) => {     const data = await DynamoDB.get({ Key: { id: '123' } }).promise();     return data; }; Bad Practice: Reinitializing resources inside the handler for every invocation.Example: exports.handler = async (event) => {     const DynamoDB = new AWS.DynamoDB.DocumentClient(); // Initialized on every call     const data = await DynamoDB.get({ Key: { id: '123' } }).promise();     return data; }; Why It Matters: Reinitializing resources for every invocation increases latency and consumes unnecessary computing power. 3. Enable Provisioned Concurrency1 Good Practice: Use Provisioned Concurrency to pre-initialize a set number of environments, ensuring they are always ready to handle requests.Example:AWS CLI: aws lambda put-provisioned-concurrency-config \ --function-name myFunction \ --provisioned-concurrent-executions 5 AWS Management Console: Why It Matters: Provisioned concurrency ensures a constant pool of pre-initialized environments, eliminating cold starts entirely for latency-sensitive applications. 4. Reduce Dependencies to optimize the lambda function Good Practice: Evaluate your libraries and replace heavy frameworks with lightweight alternatives or native APIs.Example: console.log(new Date().toISOString()); // Native JavaScript API Bad Practice: Using heavy libraries for simple tasks without considering alternatives.Example: const moment = require('moment'); console.log(moment().format()); Why It Matters: Large dependencies increase the deployment package size, leading to slower initialization during cold starts. 5. Avoid Unnecessary VPC Configurations Good Practice: Place Lambda functions outside a VPC unless necessary. If a VPC is required (e.g., to access private resources like RDS), optimize networking using VPC endpoints.Example:Use DynamoDB and S3 directly without placing the Lambda inside a VPC. Bad Practice: Deploying Lambda functions inside a VPC unnecessarily, such as accessing services like DynamoDB or S3, which do not require VPC access.Why It’s Bad: Placing Lambda in a VPC introduces additional latency due to ENI setup during cold starts. Why It Matters: Functions outside a VPC initialize faster because they skip ENI setup. 6. Choose Lightweight Runtimes to optimize lambda function Good Practice: Use lightweight runtimes like Node.js or Python for faster initialization than heavier runtimes like Java or .NET.Why It’s Good: Lightweight runtimes require fewer initialization resources, leading to lower cold start latency. Why It Matters: Heavier runtimes have higher cold start latency due to the complexity of their initialization process. Summary of Best Practices for Cold Starts AspectGood PracticeBad PracticeDeployment PackageUse small packages with only the required dependencies.Bundle unused libraries, increasing the package size.InitializationPerform heavy initialization (e.g., database connections) outside the handler.Initialize resources inside the handler for every request.Provisioned ConcurrencyEnable provisioned concurrency for latency-sensitive applications.Ignore provisioned concurrency for high-traffic functions.DependenciesUse lightweight libraries or native APIs for simple tasks.Use heavy libraries like moment.js without evaluating lightweight alternatives.VPC ConfigurationAvoid unnecessary VPC configurations; use VPC endpoints when required.Place all Lambda functions inside a VPC, even when accessing public AWS services.Runtime SelectionChoose lightweight runtimes like Node.js or Python for faster initialization.Use heavy runtimes like Java or .NET for simple, lightweight workloads. Error Handling and Logging Error handling and logging are critical for optimizing your Lambda functions are reliable and easy to debug. Effective error handling prevents cascading failures in your architecture, while good logging practices help you monitor and troubleshoot issues efficiently. Structured Error Responses Errors in Lambda functions can occur due to various reasons: invalid input, AWS service failures, or unhandled exceptions in the code. Properly structured error handling ensures that these issues are captured, logged, and surfaced effectively to users or downstream services. 1. Define Consistent Error Structures Good Practice: Use a standard error format so all errors are predictable and machine-readable.Example: {   "errorType": "ValidationError",   "message": "Invalid input: 'email' is missing",   "requestId": "12345-abcd" } Bad Practice: Avoid returning vague or unstructured errors that make debugging difficult. { "message": "Something went wrong", "error": true } Why It Matters: Structured errors make debugging easier by providing consistent, machine-readable information. They also improve communication with clients or downstream systems by conveying what went wrong and how it should be handled. 2. Use Custom Error Classes Good Practice: In Node.js, define custom error classes for clarity: class ValidationError extends Error {   constructor(message) {     super(message);     this.name = "ValidationError";     this.statusCode = 400; // Custom property   } } // Throwing a custom error if (!event.body.email) {   throw new ValidationError("Invalid input: 'email' is missing"); } Bad Practice: Use generic errors for everything, making identifying or categorizing issues hard.Example: throw new Error("Error occurred"); Why It Matters: Custom error classes make error handling more precise and help segregate application errors (e.g., validation issues) from system errors (e.g., database failures). 3. Include Contextual Information in Logs Good Practice: Add relevant information like requestId, timestamp, and input data (excluding sensitive information) when logging errors.Example: console.error({     errorType: "ValidationError",     message: "The 'email' field is missing.",     requestId: context.awsRequestId,     input: event.body,     timestamp: new Date().toISOString(), }); Bad Practice: Log errors without any context, making debugging difficult.Example: console.error("Error occurred"); Why It Matters: Contextual information in logs makes it easier to identify what triggered the error and where it happened, improving the debugging experience. Retry Logic Across AWS SDK and Other Services Retrying failed operations is critical when interacting with external services, as temporary failures (e.g., throttling, timeouts, or transient network issues) can disrupt workflows. Whether you’re using AWS SDK, third-party APIs, or internal services, applying retry logic effectively can ensure system reliability while avoiding unnecessary overhead. 1. Use Exponential Backoff and Jitter Good Practice: Apply exponential backoff with jitter to stagger retry attempts. This avoids overwhelming the target service, especially under high load or rate-limiting scenarios.Example (General Implementation): async function retryWithBackoff(fn, retries = 3, delay = 100) {     for (let attempt = 1; attempt <= retries; attempt++) {         try {             return await fn();         } catch (error) {             if (attempt === retries) throw error; // Rethrow after final attempt             const backoff = delay * 2 ** (attempt - 1) + Math.random() * delay; // Add jitter             console.log(`Retrying in ${backoff.toFixed()}ms...`);             await new Promise((res) => setTimeout(res, backoff));         }     } } // Usage Example const result = await retryWithBackoff(() => callThirdPartyAPI()); Bad Practice: Retrying without delays or jitter can lead to cascading failures and amplify the problem. for (let i = 0; i < retries; i++) {     try {         return await callThirdPartyAPI();     } catch (error) {         console.log("Retrying immediately...");     } } Why It Matters: Exponential backoff reduces pressure on the failing service, while jitter randomizes retry times, preventing synchronized retry storms from multiple clients. 2. Leverage Built-In Retry Mechanisms Good Practice: Use the built-in retry logic of libraries, SDKs, or APIs whenever available. These are typically optimized for the specific service.Example (AWS SDK): const DynamoDB = new AWS.DynamoDB.DocumentClient({     maxRetries: 3, // Number of retries     retryDelayOptions: { base: 200 }, // Base delay in ms }); Example (Axios for Third-Party APIs):Use libraries like axios-retry to integrate retry logic for HTTP requests. const axios = require('axios'); const axiosRetry = require('axios-retry'); axiosRetry(axios, {     retries: 3, // Retry 3 times     retryDelay: (retryCount) => retryCount * 200, // Exponential backoff     retryCondition: (error) => error.response.status >= 500, // Retry only for server errors }); const response = await axios.get("https://example.com/api"); Bad Practice: Writing your own retry logic unnecessarily when built-in mechanisms exist, risking suboptimal implementation. Why It Matters: Built-in retry mechanisms are often optimized for the specific service or library, reducing the likelihood of bugs and configuration errors. 3. Configure Service-Specific Retry Limits Good Practice: Set retry limits based on the service's characteristics and criticality.Example (AWS S3 Upload): const s3 = new AWS.S3({ maxRetries: 5, // Allow more retries for critical operations retryDelayOptions: { base: 300 }, // Slightly longer base delay }); Example (Database Queries): async function queryDatabaseWithRetry(queryFn) {     await retryWithBackoff(queryFn, 5, 100); // Retry with custom backoff logic } Bad Practice: Allowing unlimited retries can cause resource exhaustion and increase costs. while (true) {     try {         return await callService();     } catch (error) {         console.log("Retrying...");     } } Why It Matters: Excessive retries can lead to runaway costs or cascading failures across the system. Always define a sensible retry limit. 4. Handle Transient vs. Persistent Failures Good Practice: Retry only transient failures (e.g., timeouts, throttling, 5xx errors) and handle persistent failures (e.g., invalid input, 4xx errors) immediately.Example: const isTransientError = (error) =>     error.code === "ThrottlingException" || error.code === "TimeoutError"; async function callServiceWithRetry() {     await retryWithBackoff(() => {         if (!isTransientError(error)) throw error; // Do not retry persistent errors         return callService();     }); } Bad Practice: Retrying all errors indiscriminately, including persistent failures like ValidationException or 404 Not Found. Why It Matters: Persistent failures are unlikely to succeed with retries and can waste resources unnecessarily. 5. Log Retry Attempts Good Practice: Log each retry attempt with relevant context, such as the retry count and delay. async function retryWithBackoff(fn, retries = 3, delay = 100) {     for (let attempt = 1; attempt <= retries; attempt++) {         try {             return await fn();         } catch (error) {             if (attempt === retries) throw error;             console.log(`Attempt ${attempt} failed. Retrying in ${delay}ms...`);             await new Promise((res) => setTimeout(res, delay));         }     } } Bad Practice: Failing to log retries makes debugging or understanding the retry behavior difficult. Why It Matters: Logs provide valuable insights into system behavior and help diagnose retry-related issues. Summary of Best Practices for Retry logic AspectGood PracticeBad PracticeRetry LogicUse exponential backoff with jitter to stagger retries.Retry immediately without delays, causing retry storms.Built-In MechanismsLeverage AWS SDK retry options or third-party libraries like axios-retry.Write custom retry logic unnecessarily when optimized built-in solutions are available.Retry LimitsDefine a sensible retry limit (e.g., 3–5 retries).Allow unlimited retries, risking resource exhaustion or runaway costs.Transient vs PersistentRetry only transient errors (e.g., timeouts, throttling) and fail fast for persistent errors.Retry all errors indiscriminately, including persistent failures like validation or 404 errors.LoggingLog retry attempts with context (e.g., attempt number, delay,  error) to aid debugging.Fail to log retries, making it hard to trace retry behavior or diagnose problems. Logging Best Practices Logs are essential for debugging and monitoring Lambda functions. However, unstructured or excessive logging can make it harder to find helpful information. 1. Mask or Exclude Sensitive Data Good Practice: Avoid logging sensitive information like:User credentialsAPI keys, tokens, or secretsPersonally Identifiable Information (PII)Use tools like AWS Secrets Manager for sensitive data management.Example: Mask sensitive fields before logging: const sanitizedInput = {     ...event,     password: "***", }; console.log(JSON.stringify({     level: "info",     message: "User login attempt logged.",     input: sanitizedInput, })); Bad Practice: Logging sensitive data directly can cause security breaches or compliance violations (e.g., GDPR, HIPAA).Example: console.log(`User logged in with password: ${event.password}`); Why It Matters: Logging sensitive data can expose systems to attackers, breach compliance rules, and compromise user trust. 2.  Set Log Retention Policies Good Practice: Set a retention policy for CloudWatch log groups to prevent excessive log storage costs.AWS allows you to configure retention settings (e.g., 7, 14, or 30 days). Bad Practice: Using the default “Never Expire” retention policy unnecessarily stores logs indefinitely. Why It Matters: Unmanaged logs increase costs and make it harder to find relevant data. Retaining logs only as long as needed reduces costs and keeps logs manageable. 3. Avoid Excessive Logging Good Practice: Log only what is necessary to monitor, troubleshoot, and analyze system behavior.Use info, debug, and error levels to prioritize logs appropriately. console.info("Function started processing..."); console.error("Failed to fetch data from DynamoDB: ", error.message); Bad Practice: Logging every detail (e.g., input payloads, execution steps) unnecessarily increases log volume.Example: console.log(`Received event: ${JSON.stringify(event)}`); // Avoid logging full payloads unnecessarily Why It Matters: Excessive logging clutters log storage, increases costs, and makes it harder to isolate relevant logs. 4. Use Log Levels (Info, Debug, Error) Good Practice: Use different log levels to differentiate between critical and non-critical information.info: For general execution logs (e.g., function start, successful completion).debug: For detailed logs during development or troubleshooting.error: For failure scenarios requiring immediate attention. Bad Practice: Using a single log level (e.g., console.log() everywhere) without prioritization. Why It Matters: Log levels make it easier to filter logs based on severity and focus on critical issues in production. Conclusion In this episode of "Mastering AWS Lambda with Bao", we explored critical best practices for building reliable AWS Lambda functions, focusing on optimizing performance, error handling, and logging. Optimizing Performance: By reducing cold starts, using smaller deployment packages, lightweight runtimes, and optimizing VPC configurations, you can significantly lower latency and optimize Lambda functions. Strategies like moving initialization outside the handler and leveraging Provisioned Concurrency ensure smoother execution for latency-sensitive applications.Error Handling: Implementing structured error responses and custom error classes makes troubleshooting easier and helps differentiate between transient and persistent issues. Handling errors consistently improves system resilience.Retry Logic: Applying exponential backoff with jitter, using built-in retry mechanisms, and setting sensible retry limits optimizes that Lambda functions gracefully handle failures without overwhelming dependent services.Logging: Effective logging with structured formats, contextual information, log levels, and appropriate retention policies enables better visibility, debugging, and cost control. Avoiding sensitive data in logs ensures security and compliance. Following these best practices, you can optimize lambda function performance, reduce operational costs, and build scalable, reliable, and secure serverless applications with AWS Lambda. In the next episode, we’ll dive deeper into "Handling Failures with Dead Letter Queues (DLQs)", exploring how DLQs act as a safety net for capturing failed events and ensuring no data loss occurs in your workflows. Stay tuned! Note: 1. Provisioned Concurrency is not a universal solution. While it eliminates cold starts, it also incurs additional costs since pre-initialized environments are billed regardless of usage. When to Use:Latency-sensitive workloads like APIs or real-time applications where even a slight delay is unacceptable.When Not to Use:Functions with unpredictable or low invocation rates (e.g., batch jobs, infrequent triggers). For such scenarios, on-demand concurrency may be more cost-effective.

                13/01/2025

                293

                Bao Dang D. Q.

                Knowledge

                +0

                  Best Practices for Building Reliable AWS Lambda Functions

                  13/01/2025

                  293

                  Bao Dang D. Q.

                  Customize software background

                  Want to customize a software for your business?

                  Meet with us! Schedule a meeting with us!