From Raw Data to Perfect API Responses: Serialization in NestJS
20/12/2024
305
Table of Contents
Hello, My name is Dzung. I am a developer who has been in this game for approximately 6 years. I’ve just started exploring NestJS and am excited about this framework’s capabilities. In this blog, I want to share the knowledge I’ve gathered and practiced in NestJS. Today’s topic is serialization!
As you know, APIs are like the messengers of your application, delivering data from the backend to the client side. Without proper control, they might spill too much information, such as passwords or internal settings.
This is where serialization in NestJS steps in, turning messy, raw data into polished, purposeful API responses. With the power of serialization, you can control exactly what your users see, hide sensitive fields, format nested objects, and deliver secure, efficient, and downright beautiful responses.
In this blog, we’ll explore how serialization in NestJS works, why it’s a must-have skill for any developer, and how to implement it step by step. Your APIs will go from raw and unrefined to clean and professional by the end. Let’s dive in!
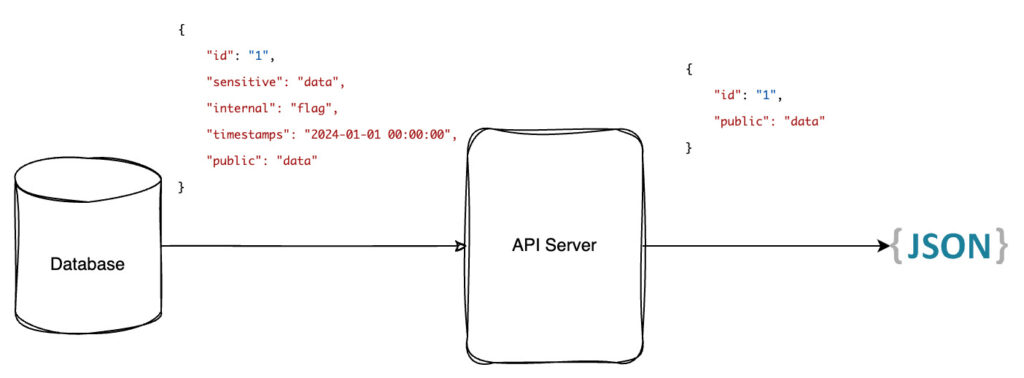
What Happens Without Serialization?
Let’s look at what happens when you don’t use serialization in your NestJS application. Imagine you’re building a user management system, and you create an API endpoint to fetch user details. Here’s your User entity:
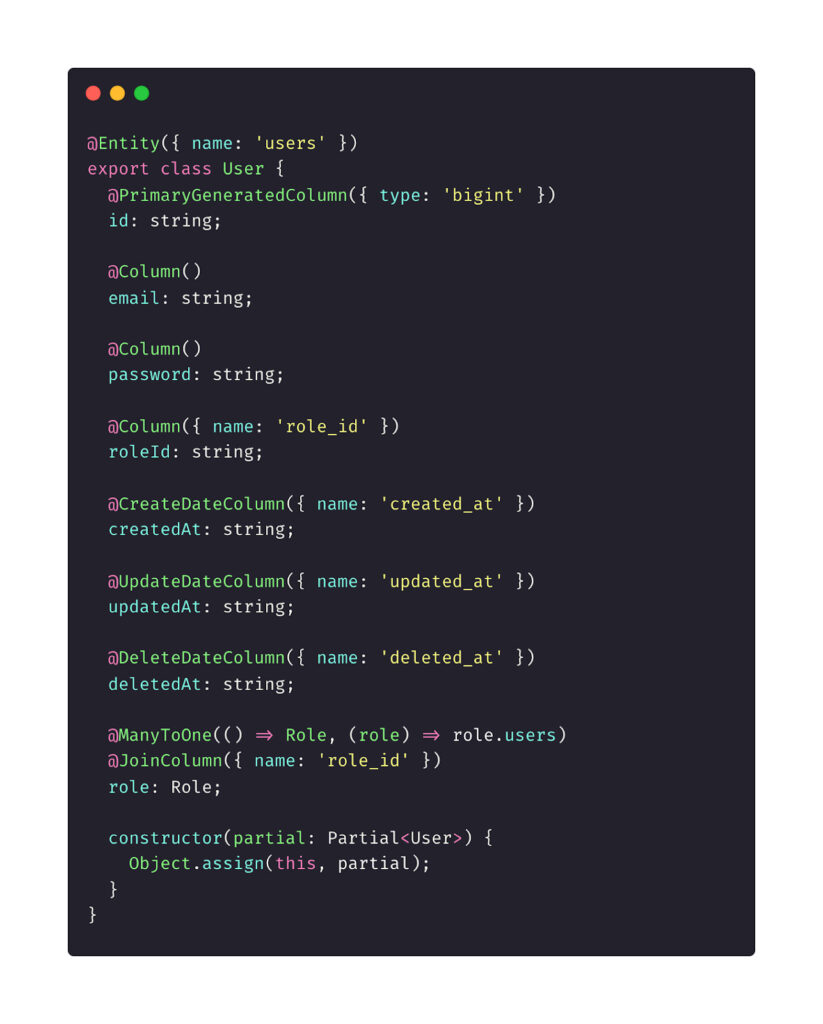
Now, you write a simple endpoint to fetch a user:
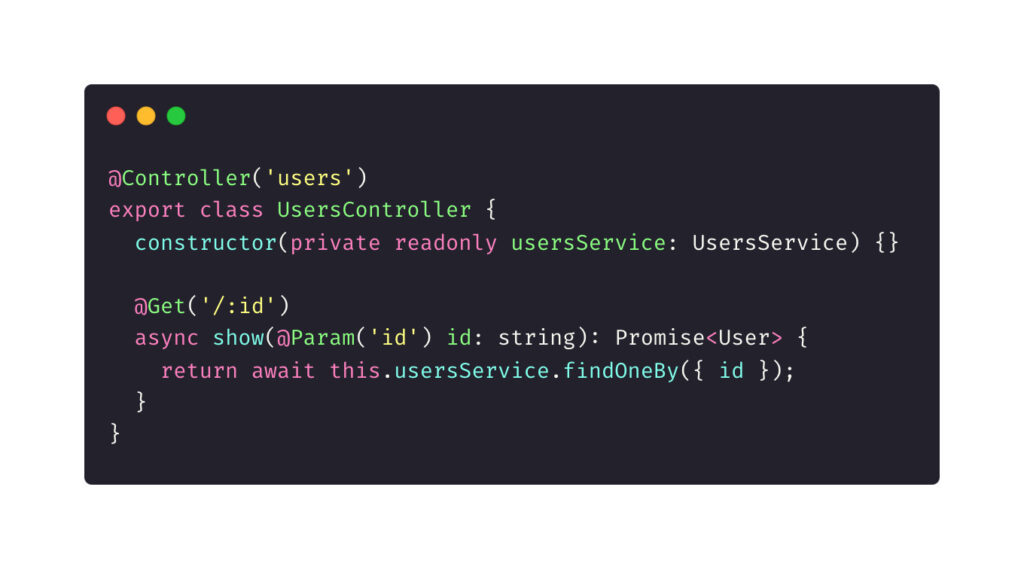
What happens when you call this endpoint? The API sends the entire user object straight to the client—every single field included:
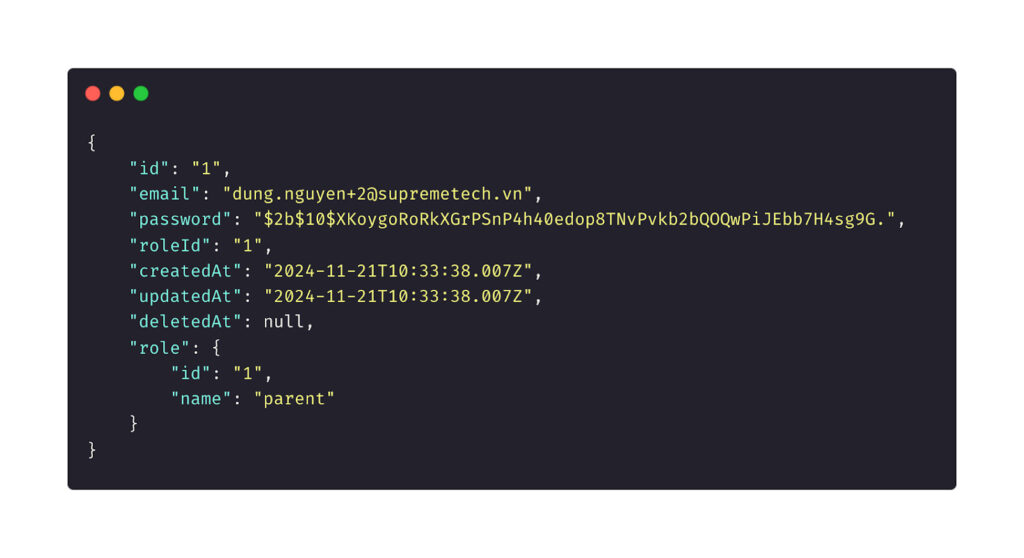
The consequences of lacking Serialization in the NestJS application
- Security Risks: Sensitive data, like passwords, should never be exposed in API responses.
- Data Overload: Users and clients don’t need internal flags or timestamps—they just add noise.
- Lack of Professionalism: Messy, unfiltered responses make your API look unpolished and unreliable.
Next, we’ll see how to clean up this mess and craft polished API responses using NestJS serialization techniques.
The Differences in Applying Serialization
By implementing serialization in your NestJS application, you can take full control over what data is exposed in your API responses. Let’s revisit the previous example and clean it up.
Step 1: Install class-transformer
To get started with serialization, you need the class-transformer package. Install it with:

Step 2: Update the User Entity with Exposed or Excluded Decorator
Use class-transformer decorators to specify which fields should be exposed or excluded.
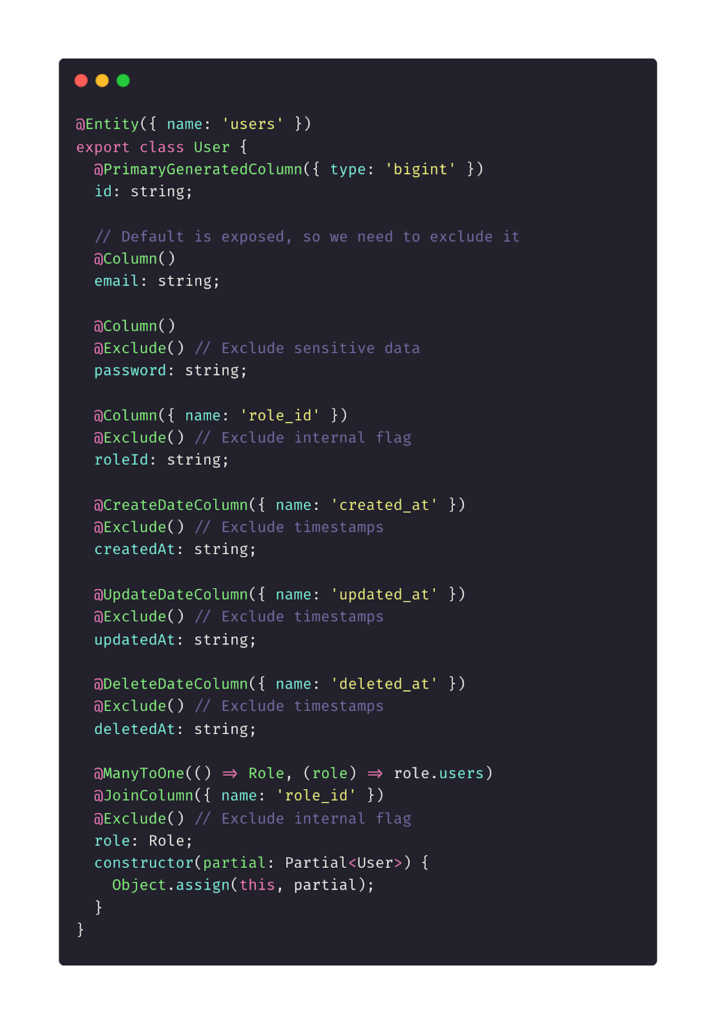
Only the ID and email fields will be included in the response.
Step 3: Apply the Serializer Interceptor
NestJS provides a built-in ClassSerializerInterceptor to handle serialization. You can apply it at different levels:
Per-Controller
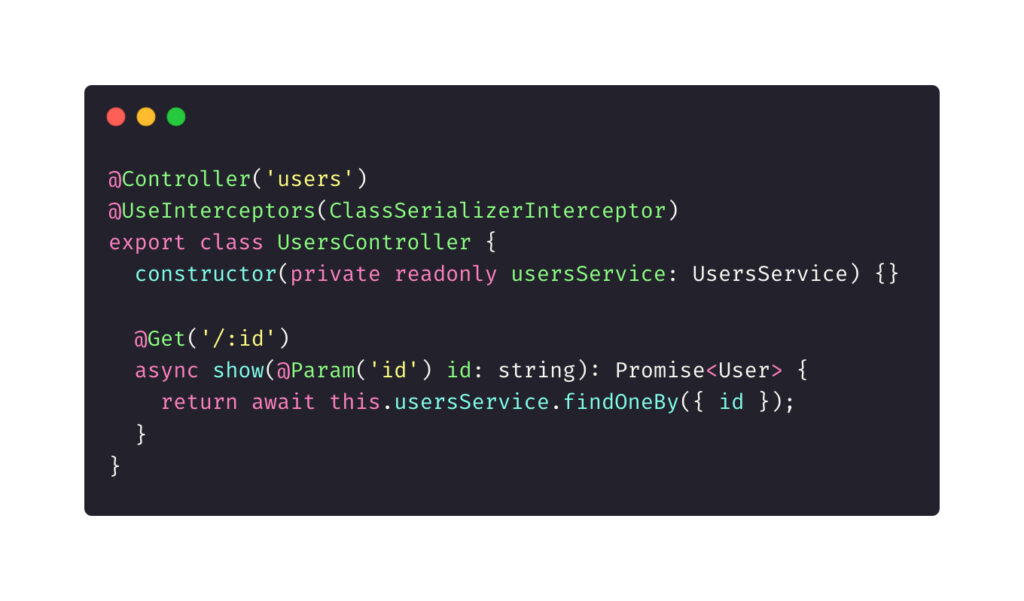
Globally
To apply serialization to all controllers, add the interceptor to the application setup:
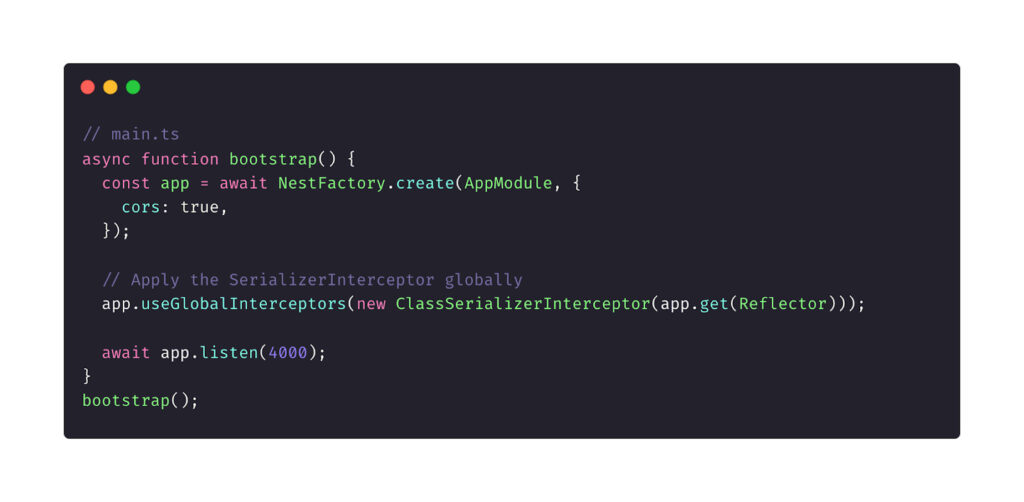
When the Get User Endpoint is called, this is what your API will now return:

Why Serialization Makes a Difference
- Security: Sensitive fields are automatically excluded, keeping your data safe.
- Clarity: Only the necessary fields are sent, reducing noise and improving usability.
- Professionalism: Clean and consistent responses give your API a polished look.
Dynamic Serialization with Group
What if you want to show different data to users, such as admins versus regular users? The class-transformer package supports groups, allowing you to expose fields based on context.
Example:
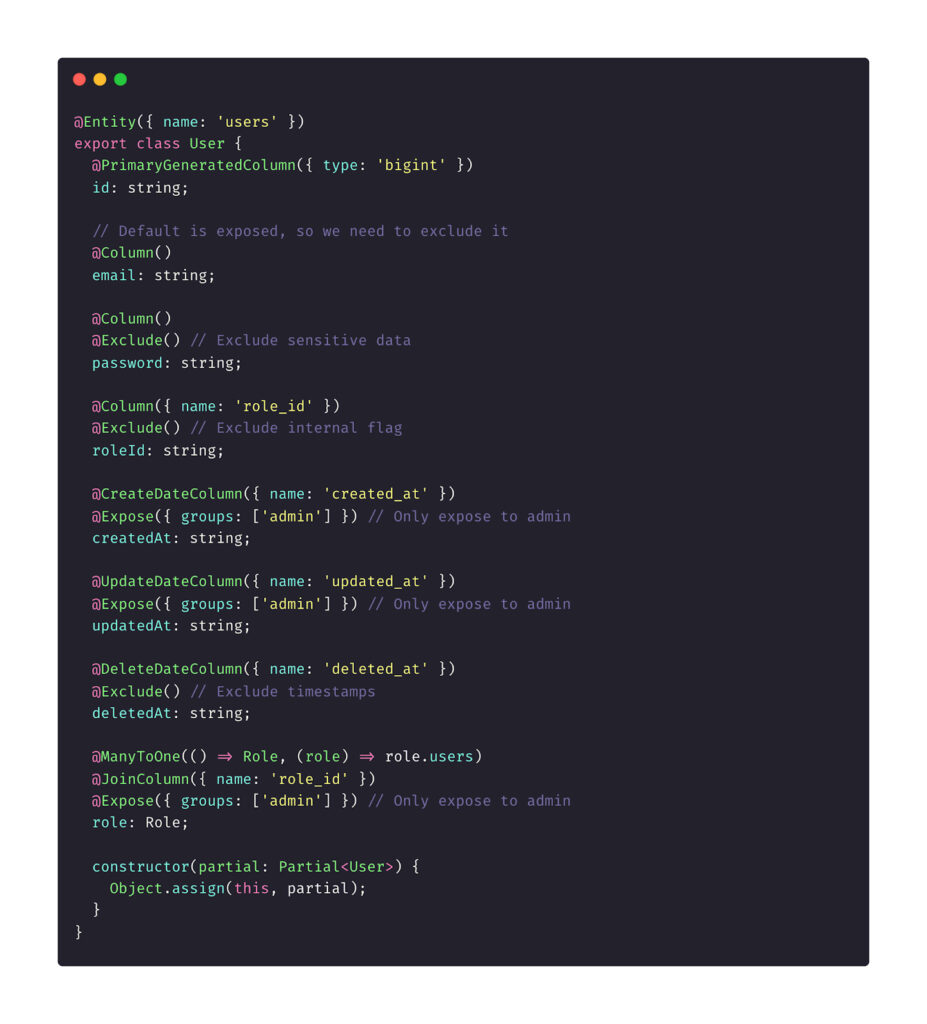
In the controller, specify the group for the transformation:
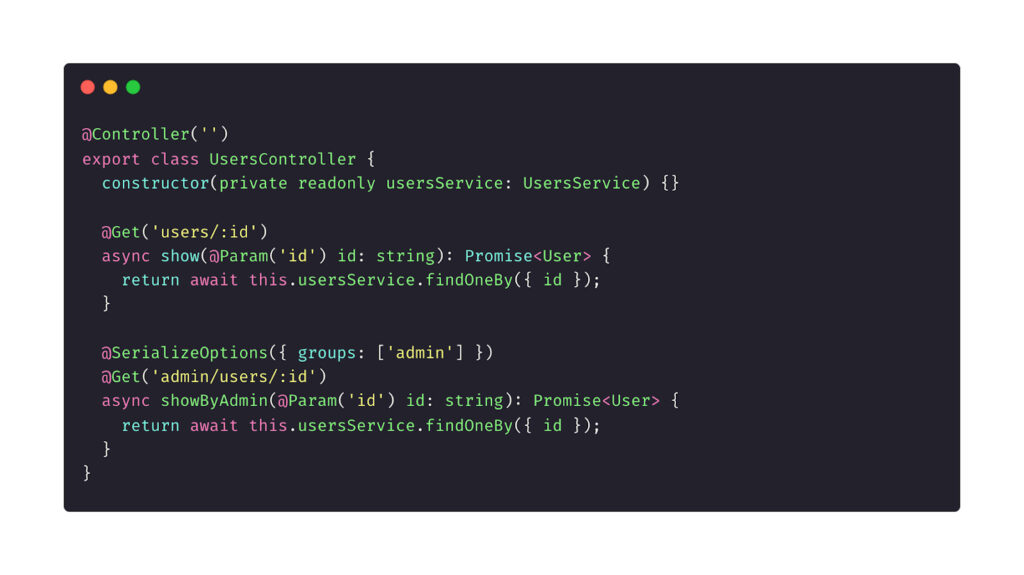
When the Get User Endpoint is called, this is what your API will now return:
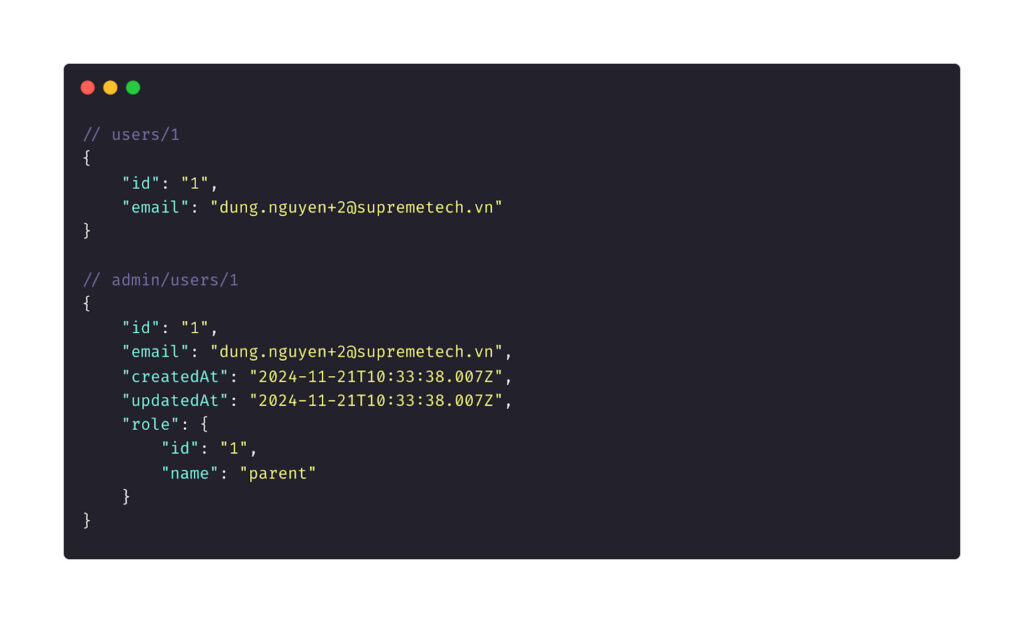
By incorporating serialization into your NestJS application, you not only improve security but also enhance the user experience by providing streamlined, predictable, and professional API responses.
Now that you know how serialization works in NestJS, you can apply these techniques to your projects, creating safer, cleaner, and more maintainable APIs.
SupremeTech has lots of experience and produces web or app services. Let’s schedule a call now if you want to work with us. Also, now we are hiring! Please check open positions for career opportunities.
Related Blog


