Header image

Makuake STORE – Shopify store development services for an original crowdfunding site

30/06/2023

1.16k

With a custom-built Shopify store management solution, Makuake STORE obtains a smoothly collaborative environment for their stakeholders to co-manage the store and deliver outstanding shopping experience.
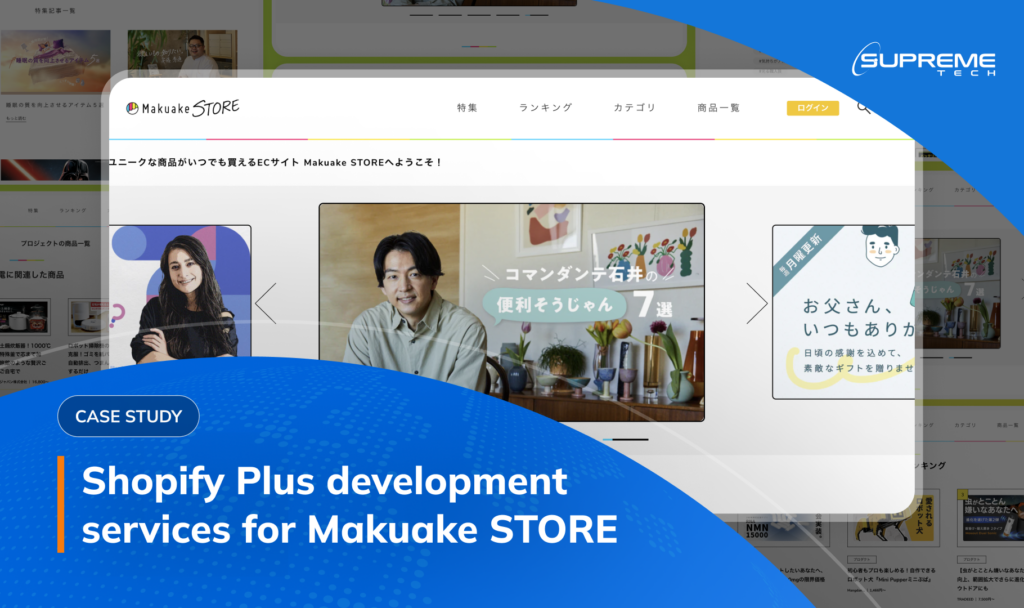
Shopify store development services
Shopify Plus development services for Makuake STORE

Technical challenges from an online mall-like business idea

Makuake Co., Ltd. initially provides a crowdfunding listing website named “Makuake” for newly launched products and services. It is a platform where creators can list their original products and call for public funding from supporters. “How can supporters buy the products after the listing is ended?” wondered Makuake leaders when the platform started to grow fast. “And it would be a waste if creators cannot continue to make money from the brilliant ideas of their own on our website. That’s the gap we will fill in.”

Makuake's crowdfunding site
Makuake’s original crowdfunding site

A single-minded desire to “continue to support the growth of the implementers” and “provide an exciting shopping experience as a place where supporters can purchase their favorite products again” urges the Makuake team to build an E-commerce site where the creators can sell their new products to the end consumers. That’s where Makuake STORE was born.

Makuake STORE, then an online mall-like store concept under the name of Makuake, should not only bring consumers the enjoyable shopping experience that no other place does, but also ensure smooth operational teamwork between Makuake and creators, not to mention retain the high-standard experience of supporters as it originally does. An excessive portfolio of products and operational requirements of the three parties involved certainly pose a mind-bending challenge to the Makuake STORE operational team.

The question is how to set up a custom Shopify store that is linked to the current crowdfunding site and a management system which Makuake team and creators can co-operate for an ultimately wonderful shopping journey. It’s a huge puzzle to solve right there.

Shopify Plus is a good choice. But it’s not enough.

After receiving a challenging brief from Makuake, we jumped into deep research and broke down the case into two phases. Then our research showed that Shopify Plus is regarded as an optimal platform to cultivate Makuake STORE on. Its available functions allowed us to launch Makuake STORE in a short amount of time without much technical effort. And that was a good choice.

Due to the time constraint at the beginning of the project, we were wired to integrate the ready-for-use apps available on Shopify to serve the basic operational needs. But we knew there certainly came a must-have circle of building and optimizing.

Phase 1: Custom Shopify development services for an admin app

We identified in our proposal that the first and foremost task is to provide merchants with a custom admin app quickly. So merchants can manage their own stores inside the Makuake STORE site. It took us soon enough to realize that the complex characteristics of a mall-like Makuake STORE cannot be fulfilled only by Shopify Plus’s limited available functions. Each merchant wanted to manage their store uniquely. What we should aim for is a custom Shopify app development that supports all three parties at the same time.

To solve this case, we flexibly developed a custom admin app to bridge the Shopify solution apps and Makuake’s current operation system to Shopify. The expertise is not to build everything from scratch because it takes a lot of time and is less cost-effective. We incorporated the custom features to the third-party apps so that the Makuake STORE operational team and merchants can perform the tasks Shopify cannot. For example, Shopify limits the number of admins accessible to the store. At the same time, Makuake STORE needs to share management roles with thousands of independent sellers to co-manage their own products and orders.

MAKUAKE Store
Atarashii – More fun shopping online!

Phase 2: Add more features to serve three-party operations

The next milestone in the product roadmap is to continue adding custom features to the app so that merchants can set up their own customers’ buying journey. Our solution takes into consideration the full-circle E-commerce management.

Custom Order

  • Order Workflows
  • Order Attributes
  • Shopify checkout flow

Shipment

  • Multi-Order tracking
  • Multi-Warehouse Shipping
  • Multi-Carrier Shipping Support
  • Automated shipment notification

Customer

  • Custom CRM procedure

Inventory

  • Multi-Warehouse management

Product data

  • Access control system
  • Automated Product Data Sync
  • Custom Product Data Mapping

The development process includes but not limited to data migration from/to Shopify, integration with 3rd-party systems, automated data exchange, PC & mobile responsive themes, maintenance services.

In terms of operational screens, there are three main parties involved: the Shopify admin for Makuake, the Seller admin, and the Operator admin. We integrated custom-built functions to upgrade the Shopify admin’s capability, and we built everything from scratch for the seller and operator admins.

While optimizing the operational system, we finetune our web app with upcoming favorite features for an “enjoyable shopping experience.” The can-do spirit inspires us to proactively and constantly seek new approaches to optimize the product. Furthermore, our pleasant correlation with the Makuake team and Shopify enables us to generate new ideas and bring them to life. Makuake is a super passionate and open-minded client who clearly guides us throughout the way and jointly tackles the challenge where it needs their expertise.

As featured in our motto “Build the next world-class together”, we consider working as one team the primary key to success. While the Makuake team focuses on perfecting the product concept, we take ownership of technology solutions and product development. Together, we make product concepts a reality. We believe our collaboration will achieve further success soon.
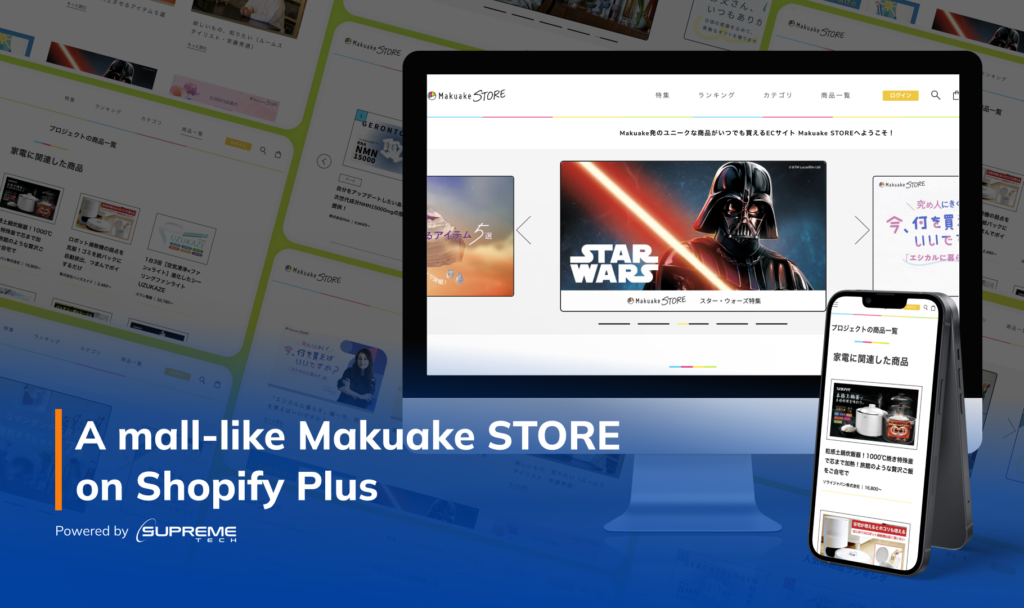
A mall-like Makuake STORE on Shopify Plus

We made it! A custom Shopify solution to streamline store operations

After 7.5 months of development and teamwork, we accomplished the project’s primary objective: to operate and maintain a fully functional management system for an online mall-like Makuake STORE. The model works well as the website records a huge traffic surge, and the popularity continues to expand widely in the Japanese market. The more the product thrives in the market, the more technical challenges to solve in our continuous development process. We cannot wait to keep moving forward and tackle those challenges!

Development systems and technologies

Below are the resources and technologies we use to deliver Shopify store development services:

Details of entrustment: Design, Implementation, Testing, Migration, Maintenance & Operation

Platform: Web app, responsive web app, Shopify

Infrastructure & Architect: AWS, Serverless, NoSQL

Development language: Node.js, React.js

Get your Shopify Plus custom development services from SupremeTech!

SupremeTech offers comprehensive solutions for migrating your current website to Shopify. We have the expertise to build tailored software that streamlines your e-commerce management and enhances customer experience.

Contact us now to take a step forward and discover how you can make your unique business idea come true with our technical solutions.

Brought to you by Makuake – SupremeTech team.

Related Blog

Knowledge

Software Development

+0

    From Raw Data to Perfect API Responses: Serialization in NestJS

    Hello, My name is Dzung. I am a developer who has been in this game for approximately 6 years. I've just started exploring NestJS and am excited about this framework's capabilities. In this blog, I want to share the knowledge I’ve gathered and practiced in NestJS. Today's topic is serialization! As you know, APIs are like the messengers of your application, delivering data from the backend to the client side. Without proper control, they might spill too much information, such as passwords or internal settings. This is where serialization in NestJS steps in, turning messy, raw data into polished, purposeful API responses. With the power of serialization, you can control exactly what your users see, hide sensitive fields, format nested objects, and deliver secure, efficient, and downright beautiful responses. In this blog, we’ll explore how serialization in NestJS works, why it’s a must-have skill for any developer, and how to implement it step by step. Your APIs will go from raw and unrefined to clean and professional by the end. Let’s dive in! What Happens Without Serialization? Let’s look at what happens when you don’t use serialization in your NestJS application. Imagine you’re building a user management system, and you create an API endpoint to fetch user details. Here’s your User entity: Now, you write a simple endpoint to fetch a user: What happens when you call this endpoint? The API sends the entire user object straight to the client—every single field included: The consequences of lacking Serialization in the NestJS application Security Risks: Sensitive data, like passwords, should never be exposed in API responses.Data Overload: Users and clients don’t need internal flags or timestamps—they just add noise.Lack of Professionalism: Messy, unfiltered responses make your API look unpolished and unreliable. Next, we’ll see how to clean up this mess and craft polished API responses using NestJS serialization techniques. The Differences in Applying Serialization By implementing serialization in your NestJS application, you can take full control over what data is exposed in your API responses. Let’s revisit the previous example and clean it up. Step 1: Install class-transformer To get started with serialization, you need the class-transformer package. Install it with: Step 2: Update the User Entity with Exposed or Excluded Decorator Use class-transformer decorators to specify which fields should be exposed or excluded. Only the ID and email fields will be included in the response. Step 3: Apply the Serializer Interceptor NestJS provides a built-in ClassSerializerInterceptor to handle serialization. You can apply it at different levels: Per-Controller Globally To apply serialization to all controllers, add the interceptor to the application setup: When the Get User Endpoint is called, this is what your API will now return: Why Serialization Makes a Difference Security: Sensitive fields are automatically excluded, keeping your data safe.Clarity: Only the necessary fields are sent, reducing noise and improving usability.Professionalism: Clean and consistent responses give your API a polished look. Dynamic Serialization with Group What if you want to show different data to users, such as admins versus regular users? The class-transformer package supports groups, allowing you to expose fields based on context. Example: In the controller, specify the group for the transformation: When the Get User Endpoint is called, this is what your API will now return: By incorporating serialization into your NestJS application, you not only improve security but also enhance the user experience by providing streamlined, predictable, and professional API responses. Now that you know how serialization works in NestJS, you can apply these techniques to your projects, creating safer, cleaner, and more maintainable APIs. SupremeTech has lots of experience and produces web or app services. Let’s schedule a call now if you want to work with us. Also, now we are hiring! Please check open positions for career opportunities.

    20/12/2024

    9

    Dung Nguyen Q.

    Knowledge

    +1

    • Software Development

    From Raw Data to Perfect API Responses: Serialization in NestJS

    20/12/2024

    9

    Dung Nguyen Q.

    Knowledge

    +0

      Atomic Design In Software Development

      Hello everyone! I'm Linh, a front-end developer passionate about discovering effective methods for system development. When I first entered the tech industry, I faced challenges organizing UI components logically and reusable. This experience motivated me to seek strategies to optimize my workflow while ensuring that the products I developed were easy to scale and maintain. Recently, I explored the concept of Atomic Design, which has become a guiding principle for me in tackling these challenges more systematically and scientifically. This approach has significantly influenced my design thinking. Through this article, I aim to inspire you and offer a fresh perspective if you're also looking for solutions for your systems. Taking Cues From Chemistry Looking for a way to build and create a design system reminds me of developments in other fields and industries. Many areas, such as design and architecture, have developed smart modular systems to produce incredibly complex things like airplanes, ships, and skyscrapers. These thoughts take me back to my school days in chemistry labs. The idea is that all matter—whether solid, liquid, gas, simple, or complex—is made up of atoms. These atoms bond to form molecules, which combine into more complex organisms, eventually creating everything in our universe. Similarly, systems built up from smaller components are more logical and connected. We can break the entire system into basic building blocks and work from there. That’s the core idea of atomic design. What Is Atomic Design? Atomic Design is an interface design methodology that focuses on creating a system of components rather than entire pages. Introduced by Brad Frost in 2013, this approach emphasizes using small, independent elements that can be reused and combined to form a cohesive whole. This strategy facilitates quicker product development, promotes a unified interface, and simplifies maintenance. “Atomic Design is a methodology where designers prioritize creating individual components and then combine them, rather than designing entire pages.” Atomic Design can enhance the design development process, promoting consistency, adaptability, and efficiency across projects. By applying the principles of Atomic Design, developers and designers can collaborate within a cohesive design system, ultimately delivering a scalable and high-quality user experience. Atomic Design organizes components into five levels, progressing from simple to complex, as illustrated above: Atoms: These are the most basic components, such as HTML tags like buttons, inputs, labels, and icons.Molecules are combinations of two or more atoms that create more complex components. For example, a form group consists of an input and a label.Organisms are more complex UI components of multiple molecules and/or atoms. For instance, a form can comprise several form groups and buttons.Templates are layout frameworks created from organisms and molecules. They define how these components are arranged on a page but do not contain actual data or content; they represent an abstract structure.Pages: These are specific instances of templates where real content is added to create complete web pages or applications. Pages include all necessary components—atoms, molecules, organisms, and templates—along with specific content for end users to interact with. In the following sections, we will explore each level of Atomic Design in detail. Atoms Similar to atoms in nature, these elements may seem abstract, but they are the foundational building blocks of all our user interfaces. In web interfaces, atoms are the fundamental HTML elements, such as labels, inputs, and buttons. As the smallest components, they cannot be broken down any further. Atoms can also be abstract concepts, including colors, fonts, and even more intangible UI aspects, like animations. Molecules When we combine atoms, things become more interesting and tangible. Molecules are groups of atoms that bond together and serve as the minor basic units of a compound. They possess unique properties and act as core elements within our design system. For example, when atoms like labels, inputs, or buttons stand alone, they are useless. However, when combined into a form, they can work effectively together. Molecules can be simple or complex and designed for reuse or one-time use. A molecule can have multiple variants (similar to components in a Variant in Figma) intended for different contexts or interactions (such as hover, pressing, or after a delay). Organisms Molecules provide us with building blocks to combine to create organisms. Organisms are groups of molecules that come together to form a more complex and complete structure. Organisms can consist of similar or different elements. For instance, a website header might include a logo, menu, and search box. When you visit the category page of most e-commerce websites, you'll see product listings displayed in a grid format, composed of smaller components like images, titles, captions, etc. Templates Templates are combinations of organisms that create complete pages. They focus on the basic content structure rather than the final content. Templates help clearly define important properties such as image sizes and text lengths, thereby establishing an effective system for managing dynamic content and ensuring alignment with the design. “You can create good experiences without knowing the content. What you can’t do is create good experiences without knowing your content structure. What is your content made from, not what your content is?” Pages Pages are specific instances of templates. Placeholder content is replaced with representative content to depict what end users will see accurately. In simpler terms, pages are templates filled with real data for presentation purposes, offering the most realistic view of the design. Developers and designers will test how templates work with actual content, allowing designers to return and adjust to molecules, organisms, and templates as needed. Benefits Of Applying Atomic Design In User Interface (UI) Design Consistency Atomic Design utilizes a modular approach, ensuring each interface element adheres to a consistent design language. When a component, such as a button or color, is modified or updated, these changes are automatically reflected across all pages, maintaining uniformity throughout the product. This consistency is crucial for large and complex design teams, where smooth and synchronized updates are essential. Reusability Reusability is one of the most significant advantages of Atomic Design. By defining basic components in a standardized way, you can reuse them throughout different contexts and parts of the product. Due to this reusability, designers and developers can quickly integrate complex interfaces from standardized small components. For example, a button designed according to the standards can be used on various pages, from the homepage to product pages and forms, without needing to be recreated. This not only minimizes repetitive work but also ensures consistency across the entire design system. Atomic Design's reusability also promotes flexibility. It allows for easy updates or replacements of a component across the system without changing every detail on each page. Maintainability Atomic Design enables designers and developers to efficiently monitor and modify specific interface parts without impacting the entire system. The team can directly adjust the associated atoms or molecules when updates are required for a component, such as a button or color. These changes will automatically be reflected across all instances of that component. This approach reduces errors, minimizes repetitive tasks, and ensures that updates are consistently applied throughout the system. Scalability Like maintainability, Atomic Design allows designers and developers to expand the system by adding new components at the appropriate levels without disrupting the overall structure. For instance, if a new type of button or content combination is needed, the team can create new atoms or molecules and seamlessly integrate them into existing organisms and templates. This method enables a system to quickly scale from a small application to larger, more complex products with many new pages and features while maintaining structural integrity. Atomic Design's scalability ensures that products can evolve continuously and improve while minimizing the effort required for updates or adjustments to meet new demands. This helps products quickly adapt to changing user needs and market conditions. A prime example of successfully implementing Atomic Design principles in UI design is the Shopee UI Design System. Shopee is building its interface systems based on Atomic Design principles to maintain consistency across its entire product range. By applying Atomic Design to fundamental components such as buttons, colors, and font families (Atoms), as well as groups of components like product lists (Molecules) and elements like navigation bars or product carousels (Organisms), Shopee enhances development speed through the reuse of standardized components, ensuring a consistent interface across multiple platforms. Reality Use-Cases Atomic Design is a robust methodology for creating user interfaces (UI) that has been extensively utilized in various open-source projects. Below are some notable systems that SupremeTech has adopted and incorporated into its client solutions: Shopify Polaris Design System Shopify uses Polaris to create a consistent interface for all applications related to Shopify. Similar to Shopee UI, Shopify Polaris applies the levels of Atoms, Molecules, and Organisms from Atomic Design into its design system. This helps Shopify enhance development efficiency and maintain long-term product quality. MedusaJS As an open-source e-commerce platform, MedusaJS implements atomic design to organize the UI components for its Storefront and Admin Dashboard. Storefront UI: When building the Shopify Storefront interface for Medusa.js projects, Atomic Design helps organize UI components hierarchically. 1. Atoms: Button:  Add to Cart button, View Product button.Text: Product title, price.Icon: Shopping cart icon, search icon. 2. Molecules: Product Card: Includes an image, title, price, and Add to Cart button.Navbar: Contains the logo, menu links, and search bar. 3. Organisms: Product Grid: A grid of product cards.Header: Combines the logo, navigation bar, and mini cart. 4. Templates: Product detail pages or product category pages. 5. Pages: Homepage, checkout page. Admin Dashboard: Medusa.js also requires an admin UI to manage products, orders, and customers. Atomic Design helps organize the admin interface. 1. Atoms: Input: Input fields (product name, price).Button: Save, Delete, or Add product buttons.Badge: Displays order status (completed, processing). 2. Molecules: Search Bar: Search input field with a button and icon.Table Row: A row in a data table (product, order). 3. Organisms: Data Table: Displays a list of products or orders.Sidebar: Navigation menu for sections like Products and Orders. 4. Templates: Product list page with sidebar and data table. 5. Pages: Product management page, order management page. By applying Atomic Design, MedusaJS achieves: Component reusability: UI components like buttons, forms, or cards can be reused in both the storefront and admin dashboard.Easy expansion: When adding new features (e.g., wishlist or promotional modules), you can combine existing Atoms, Molecules, and Organisms.Consistency assurance: Atomic Design ensures that components are uniformly designed from the admin interface to the storefront.Facilitated collaboration: Design and development teams can collaborate on a transparent hierarchical system. Wrapping Up Atomic Design is a valuable method in design and development; fundamentally, it serves as a framework for building user interfaces. The immediate benefits include time and cost savings, improved product consistency, enhanced team collaboration, support for accessibility efforts, and strategic long-term initiatives. These reasons drive organizations to adopt design systems. Mastering the core principles of modern design systems will help you grow as a designer or developer.

      16/12/2024

      39

      Linh Nguyen D. Q.

      Knowledge

      +0

        Atomic Design In Software Development

        16/12/2024

        39

        Linh Nguyen D. Q.

        Knowledge

        +0

          The Ultimate Guide to JMeter Performance Testing Tool

          At SupremeTech, we are dedicated to creating technology products that provide the best user experience. In this article, I will introduce you to JMeter performance testing, a powerful and flexible tool that significantly enhances the quality of technology products. With its ability to support various protocols, JMeter allows you to test the performance of a wide range of applications, from web services to APIs and even real-time applications. Let’s explore the types of applications JMeter can be applied to and the outstanding features it offers! For more insights into Performance Testing, check out our blogs below: The Process of Performance Testing at SupremeTech Applications Suitable for JMeter Web Applications For applications using HTTP/HTTPS protocols, such as e-commerce sites, blogs, or corporate websites, JMeter can help assess response times and system performance. RESTful APIs JMeter supports load testing for APIs, measuring response times, and checking stability. Real-Time Applications (WebSocket Applications) For applications that require real-time communication, such as chat applications or online games, JMeter offers performance testing with the WebSocket Sampler Plugin, ideal for messaging systems or online monitoring. Mobile Applications JMeter can simulate requests from mobile applications to their backend APIs, such as food delivery apps or digital banking services. Database-Driven Applications For applications that rely on database queries, like CRM or ERP systems, JMeter supports performance testing using the JDBC Request Plugin to evaluate database efficiency. Custom Protocol Applications For applications using unique protocols like TCP or UDP, JMeter allows for performance simulation and testing using the TCP Sampler, which benefits  IoT applications or data transmission over local networks. Why Should Use JMeter Performance Testing Tool? Advantages Free and open source: JMeter is a cost-free tool that is easy to use.Multi-protocol support: It supports protocols like HTTP, FTP, SOAP, REST, etc.User-friendly interface: It provides an intuitive graphical interface suitable for beginners.Scalability: Supports plugins and can integrate with CI/CD tools like Jenkins.Detailed measurement: Offers comprehensive reports on performance metrics such as latency, error rates, and response times.Distributed testing: Allows load testing across multiple servers to simulate high traffic volumes. Disadvantages    Performance limitations under heavy load: JMeter may struggle with extremely high loads due to resource consumption.Not optimized for UI testing: JMeter might not be the best choice if you need to test complex user interfaces.Limited scripting flexibility: While it uses BeanShell and Groovy scripts, it lacks the flexibility of some other tools.Complex result analysis: Default reports from JMeter may not be intuitive and require external tools for advanced analysis.Learning curve: The complex features of JMeter can take time to master. What You Should Know About JMeter Plugins Plugins are an integral part of JMeter that significantly enhance its testing capabilities. Some notable plugins include: JMeter Plugins Manager: Easily manage plugins without manual configuration.PerfMon Metrics Collector: Monitors system resources like CPU, RAM, Disk, and Network during tests.JDBC Request Plugin: Tests database performance through JDBC.WebSocket Sampler: Supports WebSocket protocol testing for real-time applications.Throughput Shaping Timer: Adjusts request rates to achieve desired throughput.ElasticSearch Backend Listener: Integrates with ElasticSearch and Kibana for data analysis and visualization. Types of Reports Provided by JMeter JMeter offers various reports to help analyze and evaluate system performance: Dashboard Report: Provides an overview with graphs and data tables to track throughput, response times, and error rates.Aggregate Report: Supplies detailed aggregated data about each sampler or group of requests.Graph Results: Displays graphs showing changes in response times and throughput over time.Response Time Distribution: Shows response time distribution to identify acceptable thresholds. JMeter is a necessary tool for testers performing performance testing across various applications and protocols. Despite some limitations, its support for plugins and detailed reporting makes monitoring and analyzing system performance easy. Best of all, it is completely free! Make the most of JMeter to ensure your application runs smoothly in testing and production environments.

          10/12/2024

          67

          Vu Nguyen Q.

          Knowledge

          +0

            The Ultimate Guide to JMeter Performance Testing Tool

            10/12/2024

            67

            Vu Nguyen Q.

            Knowledge

            +0

              SupremeTech’s Expertise in the Process of Performance Testing

              In the previous article discussing The Importance of Performance Testing and SupremeTech's Expertise, we understood the overview of performance testing and its significance for businesses. Let me introduce how SupremeTech manages performance and the process of performance testing to ensure our products are always ready to face real-world challenges. At SupremeTech, product performance is not just a priority but a commitment. So how to do performance testing? Below is a detailed process of performance testing that we implement to ensure applications operate stably and efficiently under any usage conditions. For more insights into Performance Testing, check out our blogs below: The Ultimate Guide to an Essential JMeter Performance Testing Tool Step 1: Application Optimization   1.1 Optimizing OPCache Infrastructure Team Responsible for configuring and fine-tuning OPCache on the server.Ensures that JIT (Just-In-Time) caching is enabled and that parameters align with system resources. 1.2 Database Optimization Back End Team Designs composite indexes to enhance query speed.Rewrites or optimizes SQL queries to improve efficiency and reduce execution time.Analyzes common queries and data flows. 1.3 Optimizing Laravel During Deployment Back End Team Considers activating Production Mode in Laravel.Executes the command php artisan optimize to optimize application configurations. Infrastructure Team Manages caching for configurations, routes, and views.Supports the deployment and integration of queues or jobs on the server system. Step 2: Preparing for Performance Testing Collaboration among teams is crucial to ensure that every preparation step is accurate and ready for the performance testing process. 2.1 Developing a Plan and Initial Estimates QC Team, Back-End Team Creates a detailed plan for each phase of performance testing.Proposes resource, time, and data requirements. Project Technical Leader (PTL) Reviews and approves the testing plan.Coordinates appropriate resources based on preliminary estimates. 2.2 Security Checklist Project Technical Leader (PTL) Develops a checklist of security factors to protect the system during testing. QC Team, Back End Team Review the checklist to ensure completeness and accuracy. 2.3 Preparing Test Data QC Team Creates accounts, test data, and detailed test scenarios.Writes test scripts to automate testing steps. Back End Team Assists in building complex test data or necessary APIs.Reviews and tests scripts to ensure logic aligns with the actual system. Step 3: Setting Up the Testing Environment Coordination between the QC and Infrastructure teams is essential to ensure an optimized testing environment is ready for subsequent phases. 3.1 Estimating Server Specifications Infrastructure Team Determines appropriate server configurations based on application needs and testing requirements.Provides optimal specifications based on available resources and product scale.Supplies information about physical resources and infrastructure to support testing. 3.2 Establishing the Testing Environment Infrastructure Team Installs and configures virtual machines for performance testing.Adjusts server parameters (CPU, RAM, Disk I/O) to meet testing criteria. QC Team Confirms that the environment is ready for testing based on established criteria. 3.3 Adjusting Parameters According to Testing Requirements Infrastructure Team Modifies server configurations based on optimal parameters suggested after initial tests.Ensures configuration changes do not affect system stability. Step 4: Conducting Tests 4.1 Performing Performance Tests QC Team Executes load tests on APIs and key functionalities.Utilizes testing tools (JMeter, k6, Postman, etc.) to measure performance. Infrastructure Team Supports environment management and monitors system resources during testing. 4.2 Reporting Results QC Team, Infrastructure Team Compiles test results (response times, CPU load, RAM usage, etc.) from various tools.Compares results against established performance targets.Sends detailed reports to stakeholders (PTL, Backend Team). 4.3 Post-Test Optimization Backend Team Analyzes test results and fixes bugs or optimizes source code and application logic. Infrastructure Team Adjusts server configurations or optimizes system resources based on test outcomes. QC Team Re-run tests after optimization to ensure improved performance is achieved.Compiles final test results and confirms with stakeholders. Step 5: Clearing Test Data 5.1 Restoring Server Configuration to Initial State Infrastructure Team Resets server configurations to their original state to reduce unnecessary resource consumption.Deletes or powers down virtual machines used during testing.Ensures no temporary configurations or unnecessary test environments remain in the system. 5.2 Removing All Test Data from Databases QC Team Identifies test data that needs deletion to prevent junk data from affecting the live system. Back End Team Safely deletes test data from the database while ensuring no production data is mistakenly removed.Verifies that the database is clean after deletion. This process of performance testing enables SupremeTech to optimize each stage effectively, ensuring our products achieve optimal performance before delivery to partners. With our experienced workforce, we consistently prioritize product efficiency and quality.

              10/12/2024

              64

              Vu Nguyen Q.

              Knowledge

              +0

                SupremeTech’s Expertise in the Process of Performance Testing

                10/12/2024

                64

                Vu Nguyen Q.

                Customize software background

                Want to customize a software for your business?

                Meet with us! Schedule a meeting with us!