Implementing IAP (In-App Purchases) in a React Native App
21/05/2024
816
Table of Contents
Hi coders, this is the first article in a series about React Native IAP (in-app purchases). Implementing in-app purchases (IAP) in a React Native app can significantly enhance your app’s monetization strategy. This guide will walk you through the process of setting up IAP in a React Native application, providing an overview of popular libraries, and detailing how to handle different types of purchases.
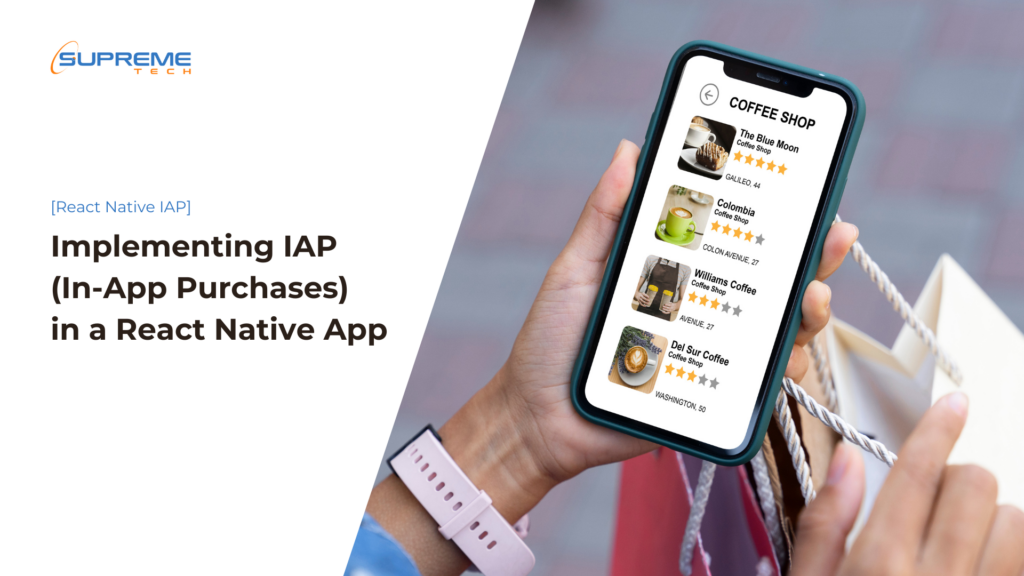
Setting Up In-App Purchases in React Native
To begin with, you need to choose a reliable library that facilitates IAP in React Native. One of the most popular options is react-native-iap. This library supports both iOS and Android, making it a versatile choice for cross-platform apps.
Step 1: Installing react-native-iap
First, you need to install the react-native-iap library. You can do this using npm or yarn:


After installing the library, link it to your project:

For React Native 0.60 and above, auto-linking takes care of this step.
Step 2: Configuring Platforms
iOS Configuration:
- Open your project in Xcode.
- Go to your project settings, and under the “Capabilities” tab, enable “In-App Purchase”.
- Make sure your app’s bundle identifier is registered with Apple, and your IAP products are configured in App Store Connect.
Android Configuration:
- Make sure your app’s package name is registered with Google Play.
- Configure your IAP products in the Google Play Console.
- Add the following permission to your
AndroidManifest.xml:

Step 3: Implementing IAP in Your App
With the library installed and platforms configured, you can now implement IAP in your React Native app.
- Import the library:

2. Initialize the library and fetch products:
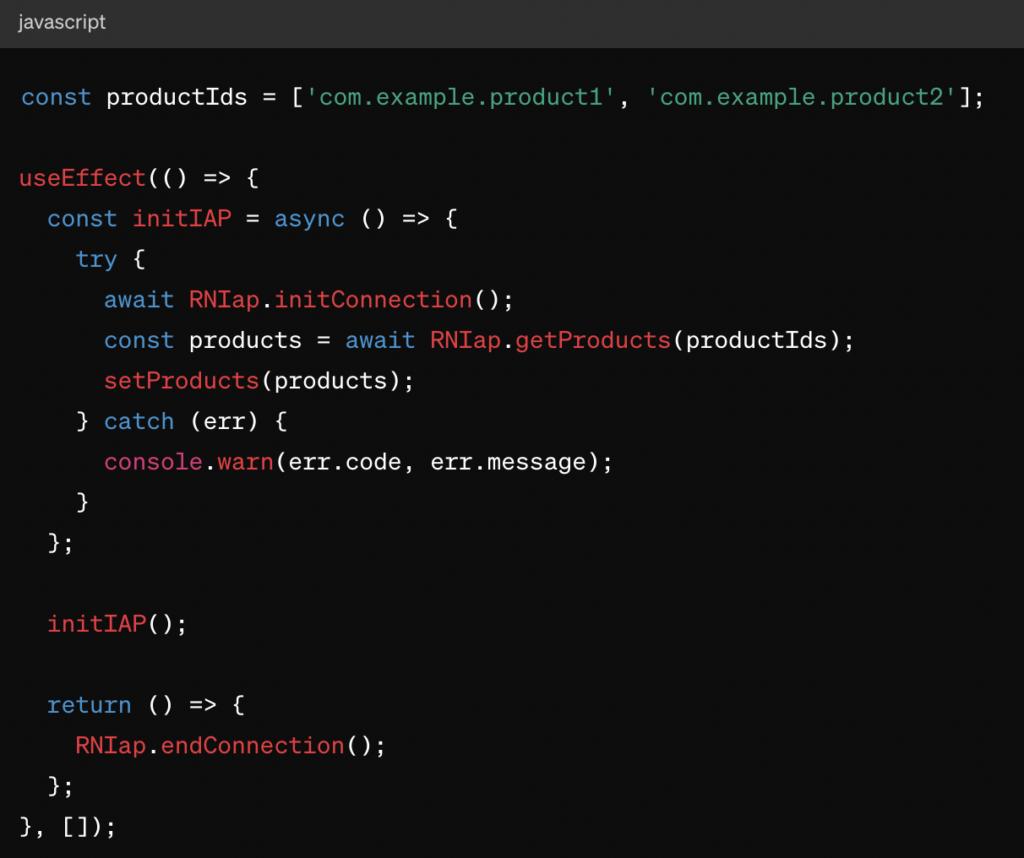
This code initializes the IAP connection and fetches product details from the store.
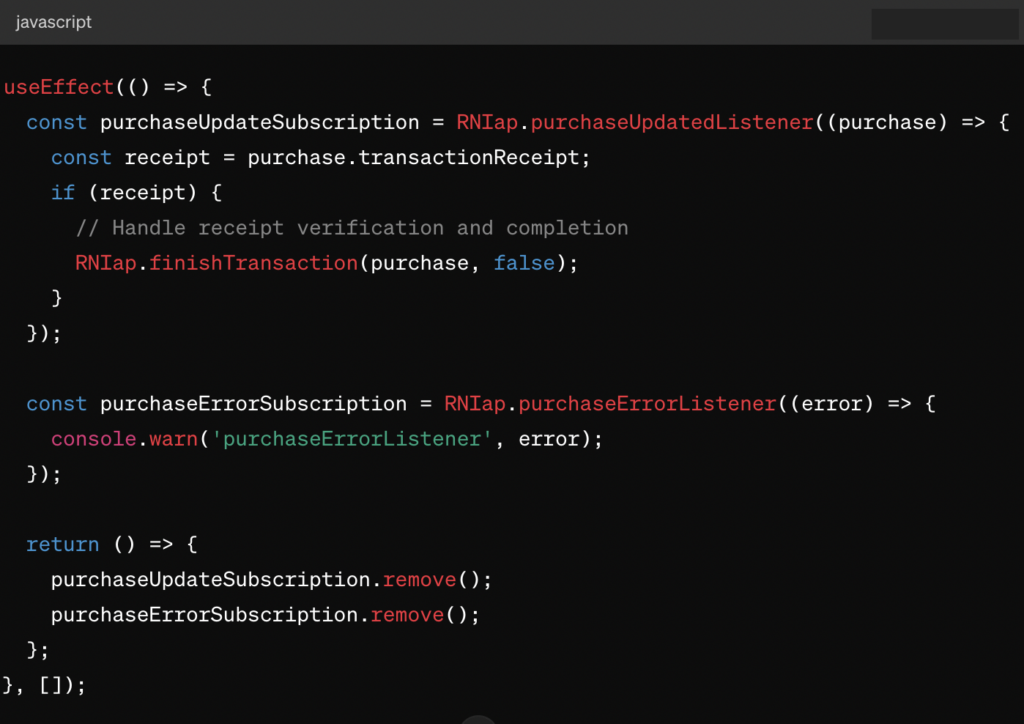
- Handling Purchases:
To handle purchases, you need to set up purchase listeners and manage the purchase flow.
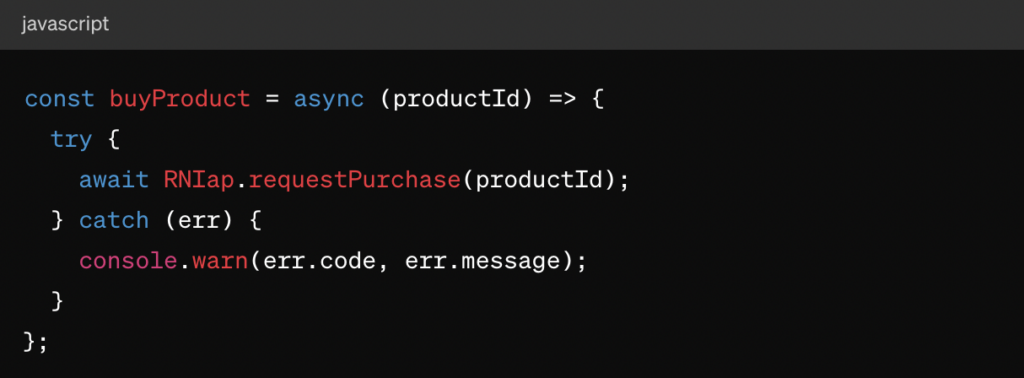
- Making a Purchase:
You can trigger a purchase using the product ID.
Handling Different Types of Purchases
Consumable Products:
Consumable products are items that can be purchased multiple times, such as coins or gems. After the purchase is verified and processed, you need to call RNIap.finishTransaction to finalize it.
Non-Consumable Products:
Non-consumable products are items that can only be purchased once per user account, such as a “Pro” upgrade. The purchase flow is similar, but you should ensure that users cannot repurchase the same item.
Subscriptions:
Subscriptions are recurring purchases. To handle subscriptions, you’ll need to check the subscription status periodically and provide appropriate access based on the subscription state.
Conclusion
Implementing in-app purchases in a React Native app involves several steps, from installing and configuring the react-native-iap library to handling various types of purchases. By following the steps outlined above, you can add a robust IAP system to your app, enabling new monetization opportunities. Remember to thoroughly test your IAP implementation and handle all edge cases to provide a seamless experience for your users.
Throughout your implementation process, adapt where necessary to get the best result. Or contact us for in-app purchase solutions in a mobile app.
Related Blog


