Header image

Back/Forward Cache, Hiện Đại Hay Hại Điện?

19/12/2022

982

Mục Lục

  • Back/forward cache là gì?
  • Nhận biết một trang được lưu, khôi phục từ back/forward cache.
  • Tối ưu hóa cho back/forward cache bằng Chrome DevTools
  • Những tác động của back/forward cache đối với trang web
Đã bao giờ bạn gặp trường hợp giống thế này chưa?

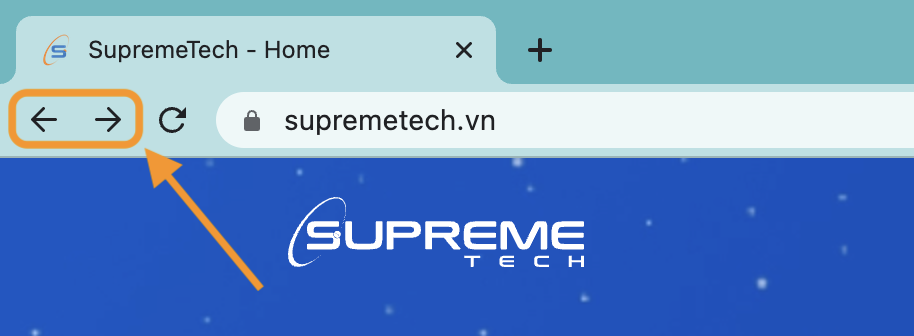
Bạn đang làm một website bán hàng. Khi người dùng đang ở trang thanh toán và đã điền đầy đủ thông tin tài khoản ngân hàng, tiếp theo họ chuyển đến trang giỏ hàng để cập nhật, sau đấy họ lại điều hướng trở lại trang thanh toán. Trên một số thiết bị, trang thanh toán sẽ được tải lại với form chứa thông tin tài khoản thanh toán được làm mới, nhưng trên một số thiết bị khác thì không, khi người dùng nhấp vào nút quay lại của trình duyệt, trang web trước đó sẽ không mất thời gian để tải lại mà nó sẽ xuất hiện ngay lập tức với những thông tin nhạy cảm mà người dùng đã nhập. Trên các thiết bị này, trang web đã được khôi phục từ một loại bộ nhớ đệm của trình duyệt có tên gọi là Back/forward cache. Trong vài trường hợp, việc lưu trữ nội dung của một trang web, để giúp người dùng có thể điều hướng trở lại ngay lập tức, mà không mất thời gian để tải lại như lúc ban đầu là một tính năng rất hay, hữu ích. Nhưng trong một số trường hợp khác, đấy cũng có thể trở thành bug.

Back/forward cache là gì?

Back/forward cache ( gọi tắt là bfcache) là một loại bộ nhớ đệm, giúp tối ưu hóa trình duyệt cho phép điều hướng quay lại và chuyển tiếp ngay lập tức. Nó cải thiện đáng kể trải nghiệm duyệt web cho người dùng — đặc biệt là những người có mạng hoặc thiết bị chậm hơn vì nó giúp trình duyệt có thể tải lại trang web trước đó mà không cần phải tải lại tài nguyên.

Phát hiện một trang được khôi phục từ bfcache.

Sự kiện pageshow được kích hoạt ngay sau sự kiện load khi trang web đang tải lần đầu và bất kỳ lúc nào trang được khôi phục từ bfcache. Sự kiện pageshow có một thuộc tính là persisted, nó sẽ có giá trị là true nếu trang được khôi phục từ bfcache (và ngược lại là false nếu không). Vì vậy, bạn có thể sử dụng thuộc tính persisted này để phân biệt trang được tải thông thường với trang được khôi phục từ bfcache. Ví dụ:

window.addEventListener('pageshow', (event) => {
  if (event.persisted) {
    console.log('Trang web nay duoc khoi phuc tu bfcache.');
  } else {
    console.log('Trang web nay duoc tai xuong binh thuong.');
  }
});

Nhận biết một trang có thể được đưa vào bfcache

Ngược lại với sự kiện pageshow ta cũng có sự kiện pagehide. Sự kiện pagehide này sẽ được kích hoạt khi trang được tải xuống bình thường hoặc khi trình duyệt cố gắng đưa nó vào bộ nhớ đệm bfcache. Sự kiện pagehide này cũng có một thuộc tính là persisted. Nếu giá trị của nó là false thì bạn có thể chắc chắn rằng một trang sẽ không được đưa vào bfcache. Tuy nhiên, nếu giá trị của thuộc tính này là true, nó không đảm bảo rằng một trang chắc chắn sẽ được lưu vào bộ nhớ đệm đâu nhé. Nó chỉ mang ý nghĩa là trình duyệt dự định lưu trang đấy vào bộ nhớ bfcache mà thôi, nhưng có thể có các yếu tố khiến nó không thể làm như vậy.

window.addEventListener('pagehide', (event) => {
  if (event.persisted) {
    console.log('Trang web nay *co the* duoc dua vao bfcache.');
  } else {
    console.log('Trang web nay khong duoc dua vao bfcache.');
  }
});

Tối ưu hóa cho bfcache bằng Chrome DevTools

Bộ nhớ đệm bfcache đã có trên tất cả các trình duyệt web phổ biến hiện nay nhưng hiện chỉ có Chrome là có cung cấp cho chúng ta công cụ để kiểm tra mà thôi. Công cụ dành cho nhà phát triển của Chrome có thể giúp bạn kiểm tra các trang của mình để đảm bảo chúng được tối ưu hóa cho bfcache và xác định bất kỳ vấn đề nào có thể khiến chúng không đủ điều kiện.
Tối ưu hóa cho bfcache bằng Chrome DevTools

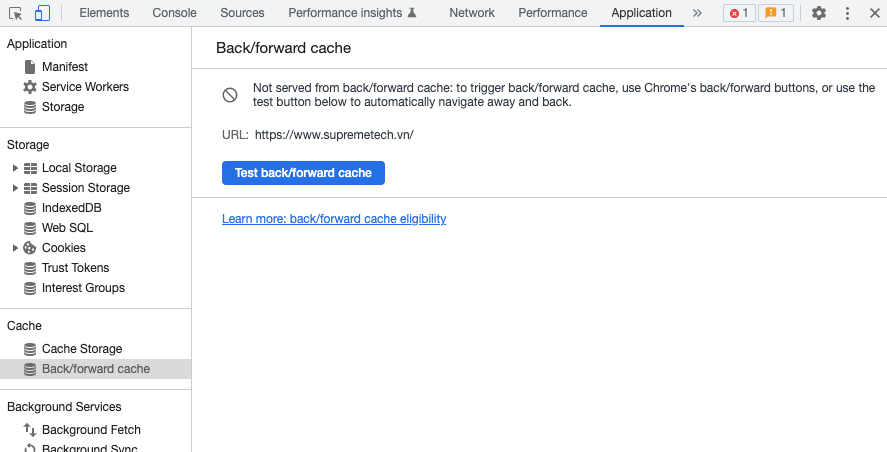
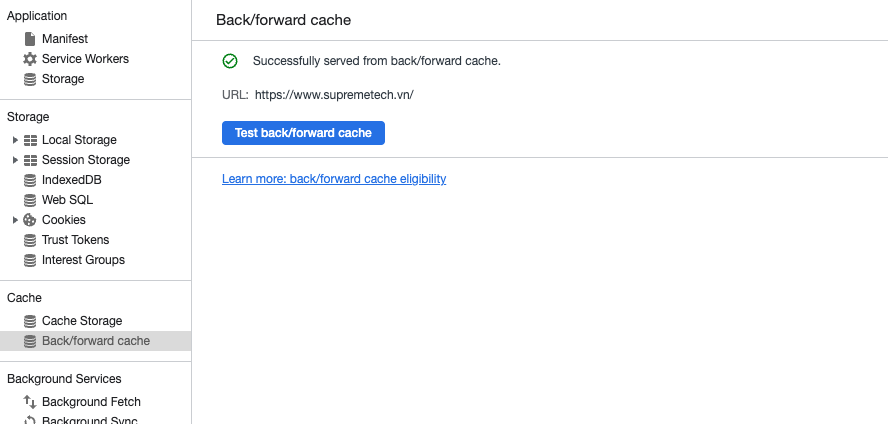
Để kiểm tra một trang cụ thể, hãy điều hướng đến trang đó trong Chrome và sau đó trong DevTools, đi tới Application > Back/forward cache. Tiếp theo, nhấp vào nút Run TestDevTools sẽ cố gắng điều hướng và quay lại để xác định xem trang có thể được khôi phục từ bfcache hay không.
Tối ưu hóa cho bfcache bằng Chrome DevTools

Nếu không thành công, bảng điều khiển sẽ cho biết trang không được khôi phục và liệt kê lý do tại sao. Nếu lý do là điều mà bạn với tư cách là nhà phát triển có thể giải quyết, thì lý do đó cũng sẽ được chỉ ra.

Cập nhật hoặc xóa dữ liệu sau khi trang web được khôi phục bfcache

Trở lại với vấn đề mà mình đặt ra ở đầu bài viết này. Nếu trang web của bạn lưu giữ trạng thái người dùng — đặc biệt là bất kỳ thông tin nhạy cảm nào của họ — thì dữ liệu đó cần được cập nhật hoặc xóa sau khi một trang được khôi phục từ bfcache.

Một ví dụ khác, thường gặp hơn là nếu người dùng đăng xuất khỏi trang web trên máy tính công cộng và người dùng tiếp theo nhấp vào nút quay lại. Điều này có thể làm lộ dữ liệu riêng tư mà người dùng cho rằng đã bị xóa sau khi họ đăng xuất. Để tránh những trường hợp như thế này, có một vài trick có thể ngăn trang được đưa vào bfcache nhưng vẫn sẽ có những ngoại lệ, vậy nên tốt hơn hết là bạn nên luôn cập nhật lại trang sau một sự kiện pageshow nếu như event.persisted có giá trị là true.

Đoạn mã sau sẽ kiểm tra sự hiện diện của cookie dành riêng cho trang web trong sự kiện pageshow và tải lại nếu không tìm thấy cookie:

window.addEventListener('pageshow', (event) => {
  if (event.persisted && !document.cookie.match(/my-cookie/)) {
    // Bat buoc tai lai trang neu nhu nuoi dung da dang xuat.
    location.reload();
  }
});

Thống kê lượt truy cập trang web có sử dụng bfcache

Như đã giới thiệu ở phần trên, nếu một trang web được khôi phục từ bfcache thì nó sẽ không tốn tài nguyên, dữ liệu mạng, điều đó cũng đồng nghĩa với việc trang web đó đã bị mất đi một lượt truy cập nếu bạn theo dõi lượt truy cập vào trang web của mình bằng các công cụ phân tích vì hầu hết các thư viện công cụ phân tích phổ biến không theo dõi khôi phục bfcache dưới dạng số lần xem trang mới. Vậy nên, nếu bạn không biết/lường được vấn đề này thì việc giảm lưu lượng truy cập, lượt xem do bfcache gây ra sẽ ít nhiều có ảnh hưởng không tốt đến việc xếp hạng trang web của bạn, mặc dù nó giúp tăng trải nghiệm của người dùng.

Nếu bạn không muốn số lần xem trang của mình giảm xuống do trình duyệt bật bfcache, bạn có thể báo cáo số lần khôi phục bfcache dưới dạng số lần xem trang (được khuyến nghị) bằng cách lắng nghe sự kiện pageshow và kiểm tra thuộc tính persisted.

Ví dụ sau đây cho thấy cách thực hiện việc này với Google Analytics ( logic cũng tương tự đối với các công cụ phân tích khác ) :

// Gui mot luot xem khi trang duoc tai lan dau tien.
gtag('event', 'page_view');

window.addEventListener('pageshow', (event) => {
  // Gui mot luot xem khi trang duoc khoi phuc tu bfcache.
  if (event.persisted) {
    gtag('event', 'page_view');
  }
});

Tổng kết

Cái gì cũng có giá trị của nó, cũng có tồn tại những ưu và nhược điểm, bfcache cũng không ngoại lệ. Việc quay lại một trang trước đó mà không phải tải lại từ đầu là một tính năng rất hữu ích, không chỉ giúp tăng tốc độ điều hướng mà còn giảm việc sử dụng dữ liệu, vì trình duyệt không cần phải tải lại tài nguyên. Điều này giúp tăng trải nghiệm của người dùng đáng kể nhưng nó cũng tiềm ẩn rủi ro về bảo mật dữ liệu cá nhân, làm giảm lượt truy cập trang trực tuyến và một số vấn đề khác nữa. Điều quan trọng là bản thân người lập trình viên phải biết và kiểm soát được nó trong từng trường hợp, vì nếu không, trong một số trường hợp, tính năng cũng có thể sẽ trở thành bug.

Bài viết này không chỉ dành cho các lập trình viên tham khảo mà ngay cả các tester cũng có thể đưa vào trong test case của mình đặc biệt là trong các trang web có yêu cầu yếu tố bảo mật hoặc những trang có dữ liệu thường xuyên thay đổi.

Hi vọng bài viết này của mình hữu ích đối với các bạn. Đừng quên share và gắn bookmark cho bài viết này để tiện xem lại sau này nhé 😉 !

Tài liệu tham khảo

Related Blog

ionic vs react native

Software Development

+0

    Ionic vs. React Native: A Comprehensive Comparison

    Ionic vs. React Native is a common debate when choosing a framework for cross-platform app development. Both frameworks allow developers to create apps for multiple platforms from a single codebase. However, they take different approaches and excel in different scenarios. Here’s a detailed comparison. Check out for more comparisons like this with React Native React Native vs. Kotlin Platform Native Script vs. React Native The origin of Ionic Framework Ionic Framework was first released in 2013 by Max Lynch, Ben Sperry, and Adam Bradley, founders of the software company Drifty Co., based in Madison, Wisconsin, USA. What's the idea behind Ionic? The creators of Ionic saw a need for a tool that could simplify the development of hybrid mobile apps. At the time, building apps for multiple platforms like iOS and Android required separate codebases, which was time-consuming and resource-intensive. Therefore, the goal was to create a framework that allowed developers to use web technologies—HTML, CSS, and JavaScript—to build apps that could run on multiple platforms with a single codebase. Its release and evolution over time The first version of Ionic was released in 2013 and was built on top of AngularJS. It leveraged Apache Cordova (formerly PhoneGap) to package web apps into native containers, allowing access to device features like cameras and GPS. 2016: With the rise of Angular 2, the team rebuilt Ionic to work with modern Angular. The renovation improved performance and functionality. 2018: Ionic introduced Ionic 4, which decoupled the framework from Angular, making it compatible with other frameworks like React, Vue, or even plain JavaScript. 2020: The company developed Capacitor, a modern alternative to Cordova. It provides better native integrations and supports Progressive Web Apps (PWAs) seamlessly. Key innovations of Ionic First of all, Ionic popularized the use of web components for building mobile apps. In addition, it focused on design consistency, offering pre-built UI components that mimic native app designs on iOS and Android. Thirdly, its integration with modern frameworks (React, Vue) made it appealing to a broader developer audience. Today, Ionic remains a significant player in the hybrid app development space. It's an optimal choice for projects prioritizing simplicity, web compatibility, and fast development cycles. It has a robust ecosystem with tools like Ionic Studio. Ionic Studio is a development environment for building Ionic apps. The origin of React Native React Native originated at Facebook in 2013 as an internal project to solve challenges in mobile app development. Its public release followed in March 2015 at Facebook’s developer conference, F8. Starting from the problem of scaling mobile development In the early 2010s, Facebook faced a significant challenge in scaling its mobile app development. They were maintaining separate native apps for iOS and Android. It made up duplicate effort and slowed down development cycles. Additionally, their initial solution—a hybrid app built with HTML5—failed to deliver the performance and user experience of native apps. This failure prompted Facebook to seek a new approach. The introduction of React for Mobile React Native was inspired by the success of React, Facebook’s JavaScript library for building user interfaces, introduced in 2013. React allowed developers to create fast, interactive UIs for the web using a declarative programming model. The key innovation was enabling JavaScript to control native UI components instead of relying on WebView rendering. Its adoption and growth React Native quickly gained popularity due to its: Single codebase for iOS and Android.Performance comparable to native apps.Familiarity for web developers already using React.Active community and support from Facebook. Prominent companies like Instagram, Airbnb, and Walmart adopted React Native early on for their apps. Today, React Native remains a leading framework for cross-platform app development. While it has faced competition from newer frameworks like Flutter, it continues to evolve with strong community support and regular updates from Meta (formerly Facebook). Ionic vs. React Native: What's the key differences? Core Technology and Approach React Native Uses JavaScript and React to build mobile apps.Renders components using native APIs, resulting in apps that feel closer to native experiences.Follows a “native-first” approach, meaning the UI and performance mimic native apps. Ionic Uses HTML, CSS, and JavaScript with frameworks like Angular, React, or Vue.Builds apps as Progressive Web Apps (PWAs) or hybrid mobile apps.Renders UI components in a WebView instead of native APIs. Performance React Native: Better performance for apps that require complex animations or heavy computations.Direct communication with native modules reduces lag, making it suitable for performance-intensive apps. Ionic: Performance depends on the capabilities of the WebView.Works well for apps with simpler UI and functionality, but may struggle with intensive tasks or animations. User Interface (UI) React Native: Leverages native components, resulting in a UI that feels consistent with the platform (e.g., iOS or Android).Offers flexibility to customize designs to match platform guidelines. Ionic: Uses a single, web-based design system that runs consistently across all platforms.While flexible, it may not perfectly match the native look and feel of iOS or Android apps. Development Experience React Native: Ideal for teams familiar with React and JavaScript.Offers tools like Hot Reloading, making development faster.Requires setting up native environments (Xcode, Android Studio), which can be complex for beginners. Ionic: Easier to get started for web developers, as it uses familiar web technologies (HTML, CSS, JavaScript).Faster setup without needing native development environments initially. Ecosystem and Plugins React Native: Extensive library of third-party packages and community-driven plugins.Can access native features directly but may require writing custom native modules for some functionalities. Ionic: Has a wide range of plugins via Capacitor or Cordova for accessing native features.Some plugins may have limitations in terms of performance or compatibility compared to native implementations. Conclusion: Which One to Choose? Choose React Native if:You want high performance and a native-like user experience.Your app involves complex interactions, animations, or heavy processing.You’re building an app specifically for mobile platforms.Choose Ionic if:You need a simple app that works across mobile, web, and desktop.You have a team of web developers familiar with HTML, CSS, and JavaScript.You’re on a tight budget and want to maximize code reusability. Both frameworks are excellent in their own right. Your choice depends on your project’s specific needs, the skill set of your development team, and your long-term goals.

    19/11/2024

    19

    Linh Le

    Software Development

    +0

      Ionic vs. React Native: A Comprehensive Comparison

      19/11/2024

      19

      Linh Le

      inter bee 2024

      OTT Streaming

      Our success stories

      +0

        SupremeTech & Enlyt Showcase CloudTV Streaming Solution at Inter BEE 2024

        SupremeTech, along with our partner Enlyt, is excited to present CloudTV, our advanced streaming platform, at Inter BEE 2024. This event is a great chance for us to connect with other professionals in media and technology. We aim to show how CloudTV can help businesses deliver smooth and high-quality streaming to their audiences. Through CloudTV, we’re ready to make streaming easier and more accessible. Inter BEE 2024 is held between November 13 and 15, 2024. Let's join us! About Inter BEE 2024 Inter BEE, or International Broadcast Equipment Exhibition, is one of Japan’s biggest media and tech events. It takes place at Makuhari Messe and marks its significant 60th year in 2024. This exhibition gathers thousands of visitors and exhibitors from around the world. They include professionals from video, audio, and digital media industries. Over 1,000 exhibitors are part of this year’s event, and they bring their latest tools and ideas in content creation, delivery, and audience engagement. Inter BEE also includes unique interactive spaces, like INTER BEE CINEMA, which focuses on new film production tools, and the INTER BEE AWARD, which celebrates top media innovations. This setup makes Inter BEE a place where the latest trends and future ideas come together. Introducing CloudTV, our custom OTT streaming solution CloudTV is a flexible streaming solution that SupremeTech has created for businesses. Built on strong cloud technology, CloudTV lets businesses create their own streaming platforms quickly and easily. It allows for high-quality video streaming that can be viewed on any device—smartphones, computers, or smart TVs. CloudTV is also secure and easy to customize, so each business can make the platform look and feel their own. CloudTV solves problems around scaling and technical complexity. Whether a business is large or small, CloudTV’s setup makes streaming simple and reliable. By supporting the latest streaming standards, CloudTV ensures great video quality across different screens and devices. This makes CloudTV a smart choice for businesses that want to reach viewers with a smooth and simple streaming experience. Get in Touch with SupremeTech If you’re interested in a streaming solution that is simple, reliable, and flexible, come visit our booth at Inter BEE 2024. We’re ready to discuss how CloudTV can help meet your unique streaming needs. You can also reach out to SupremeTech directly to explore how we can create a custom streaming platform for your business. Let’s work together to make streaming easy and engaging with CloudTV.

        14/11/2024

        122

        Linh Le

        OTT Streaming

        +1

        • Our success stories

        SupremeTech & Enlyt Showcase CloudTV Streaming Solution at Inter BEE 2024

        14/11/2024

        122

        Linh Le

        Our success stories

        +0

          SupremeTech welcomes GITS Group to the first GITS CEO Summit in Da Nang

          SupremeTech is excited to announce that we are co-hosting the GITS CEO Summit 2024 in Da Nang. As a proud member of the GITS Group, we look forward to welcoming leaders from around the world to this annual gathering. The summit is our largest internal event, where top executives will discuss technology trends, opportunities, and challenges for the upcoming year. We will focus on innovation, global strategies, and building a stronger GITS community. Why Da Nang? The summit will take place in Da Nang, which is not only known for its beautiful beaches and modern facilities but also for the thriving hub of technology in Vietnam. This vibrant city provides an ideal setting for leaders to connect, explore new business ideas, and share valuable insights. Da Nang is also home to many tech companies and startups advancing Vietnam’s position on the global technology map. By hosting the GITS CEO Summit here, SupremeTech aims to highlight Da Nang’s strategic importance and underscore its potential to be an international center for digital innovation. The Significance of the GITS CEO Summit 2024 The GITS CEO Summit 2024 will take place on December 06, bringing together over 70 CEOs from GITS member companies across Vietnam, Australia, Germany, South Korea, and Singapore. We will exchange ideas on technology trends, opportunities, and challenges for the coming year to drive business growth. We will also review the past year’s activities, share plans for 2025, and honor members who have made outstanding contributions to GITS. This year, the summit will be held at the beautiful Naman Retreat Resort, marking a fresh chapter in their journey toward tech excellence. This summit will be a crucial gathering for industry leaders and tech experts, offering meaningful connections through focused conference sessions, a poolside dinner party under the stars, expert talks on manufacturing and finance, and plenty of networking opportunities for everyone involved. This summit goes beyond the normal conference event. It’s a spontaneous gathering hub that puts technology discussion in a practical context and accelerates union among tech leaders. As collaboration becomes ever more important, this summit will help address tech development challenges and inspire fresh ideas for the future. Key Themes “Global Connections, Technology Adoptions” Under the theme "Global Connections. Technology Adoption," the summit aims to foster meaningful conversations about new technologies and how they affect Vietnam's economy. The agenda includes: 1. Keynote presentation: Vietnam IT Report by Dragon Capital2. Panel discussion: Digital Transformation in Manufacturing3. Panel discussion: ESG Compliance & Opportunities for Growth4. Panel discussion: Vietnam IT Goes Global: Challenges and Lessons Learned At the end of the gathering, our CEO members will engage in a joyful gala dinner to celebrate the past year milestones. The event is expected to inspire technology leaders by both insightful talks and vibrant connections. The GITS Summit 2023 successfully took place in Hanoi Look back on the success of SupremeTech and GITS in Vietnam IT Day 2024 SupremeTech and GITS previously teamed up to host Vietnam IT Day 2024, an event that left a strong impression on Vietnam’s IT community and beyond. This event, held in Sydney, Australia, brought together IT leaders to discuss the future of Vietnam’s tech industry. The focus was on strengthening Vietnam’s reputation as a global tech player, and it was highly successful in facilitating meaningful connections between Vietnamese IT companies and international partners. Learn more about Vietnam IT Day 2024 here. Building on the success of Vietnam IT Day, SupremeTech and GITS are excited to expand our vision for the GITS CEO Summit 2024. Want to stay updated about the event, let's follow us for more. See you in Da Nang!

          13/11/2024

          50

          Ngan Phan

          Our success stories

          +0

            SupremeTech welcomes GITS Group to the first GITS CEO Summit in Da Nang

            13/11/2024

            50

            Ngan Phan

            authentication in react native

            Software Development

            +0

              Getting Started with Authentication in React Native

              Authentication is a critical part of most mobile applications. It helps verify user identity and control access to data and features. There are several libraries that make it easier to set up authentication in React Native. This guide will walk you through the basics of authentication, using the popular libraries react-native-app-auth and Auth0. Why Use an Authentication Library? Using an authentication library simplifies the process of managing user credentials, tokens, and permissions. It also adds security, as these libraries follow the latest standards and best practices. Here, we’ll explore react-native-app-auth for OAuth 2.0 authentication and Auth0 for a more comprehensive identity management solution. Setting Up Authentication with react-native-app-auth react-native-app-auth is a library that supports OAuth 2.0 and OpenID Connect. It’s suitable for apps that need to connect with Google, Facebook, or other providers that support OAuth 2.0. Installation Start by installing the library with: npm install react-native-app-auth If you’re using Expo, you’ll need to use expo-auth-session instead, as react-native-app-auth is not compatible with Expo. Basic Setup To set up react-native-app-auth, configure it with the provider's details (e.g., Google): import { authorize } from 'react-native-app-auth'; const config = { issuer: 'https://accounts.google.com', // Google as OAuth provider clientId: 'YOUR_GOOGLE_CLIENT_ID', redirectUrl: 'com.yourapp:/oauthredirect', scopes: ['openid', 'profile', 'email'], }; In this configuration: issuer is the URL of the OAuth provider.clientId is the ID you receive from the provider.redirectUrl is the URL your app redirects to after authentication.scopes defines what data you’re requesting (e.g., user profile and email). Implementing the Login Function With the configuration done, create a function to handle login: const login = async () => { try { const authState = await authorize(config); console.log('Logged in successfully', authState); // Use authState.accessToken for secure requests } catch (error) { console.error('Failed to log in', error); } }; Here: authorize(config) triggers the authentication flow.If successful, authState contains the access token, ID token, and expiration date.Use the accessToken to make requests to the API on behalf of the user. Logging Out To log users out, clear their tokens: const logout = async () => { try { await authorize.revoke(config, { tokenToRevoke: authState.accessToken }); console.log('Logged out'); } catch (error) { console.error('Failed to log out', error); } }; This will remove the access token and effectively log out the user. Setting Up Authentication in React Native with Auth0 Auth0 is a widely used identity provider that offers a more comprehensive authentication setup. It supports multiple login methods, such as social login, username/password, and enterprise authentication. Installation Install the Auth0 SDK for React Native: npm install react-native-auth0 Basic Setup Initialize the Auth0 client by providing your domain and client ID: import Auth0 from 'react-native-auth0'; const auth0 = new Auth0({ domain: 'YOUR_AUTH0_DOMAIN', clientId: 'YOUR_CLIENT_ID', }); Implementing the Login Function Use Auth0’s web authentication method to start the login flow: const login = async () => { try { const credentials = await auth0.webAuth.authorize({ scope: 'openid profile email', audience: 'https://YOUR_AUTH0_DOMAIN/userinfo', }); console.log('Logged in successfully', credentials); // Store credentials.accessToken for API requests } catch (error) { console.error('Failed to log in', error); } }; Here: scope and audience define the permissions and data you request.credentials.accessToken will be used for secure API requests. Logging Out To log out with Auth0: const logout = async () => { try { await auth0.webAuth.clearSession(); console.log('Logged out'); } catch (error) { console.error('Failed to log out', error); } }; Storing Tokens Securely Tokens are sensitive data and should be stored securely. Use libraries like react-native-keychain or SecureStore in Expo to securely store tokens: import * as Keychain from 'react-native-keychain'; const storeToken = async (token) => { await Keychain.setGenericPassword('user', token); }; const getToken = async () => { const credentials = await Keychain.getGenericPassword(); return credentials ? credentials.password : null; }; Conclusion This guide covered setting up basic authentication in React Native with react-native-app-auth and Auth0. These libraries streamline the process of handling secure login and token management. After implementing, remember to handle token storage securely to protect user data. Streamline Authentication in React Native with SupremeTech’s Offshore Development Expertise Setting up authentication in a React Native app can be complex, but with the right libraries, it's achievable and secure. Whether using react-native-app-auth for OAuth 2.0 or Auth0 for comprehensive identity management, these tools help handle user authentication smoothly and securely. For businesses aiming to scale and streamline mobile app development, SupremeTech offers skilled offshore development services, including React Native expertise. Our teams are experienced in building secure, high-performance applications that meet industry standards. If you're looking to enhance your mobile development capabilities with a trusted partner, explore how SupremeTech can support your growth.

              11/11/2024

              47

              Linh Le

              Software Development

              +0

                Getting Started with Authentication in React Native

                11/11/2024

                47

                Linh Le

                Customize software background

                Want to customize a software for your business?

                Meet with us! Schedule a meeting with us!